Sometimes Windows Store apps may keep crashing every time you run it, in Windows 11/10. This may happen for no apparent reason. As a solution, you may have tried running the App Troubleshooter or even successfully uninstalling and then reinstalling the app. But still, you may find that the app may continue to crash even after the reinstallation.
Windows Store apps crashing in Windows 11/10
If your Windows Store app is crashing every time you run it, you may want to check out these posts before you proceed:
- How to Repair Windows Store Apps
- Troubleshoot and Fix Apps problems with Windows Apps Troubleshooter
- Fix: Random Windows UWP App Crashes
If none of these help, the final solution could possibly be to completely uninstall and remove the particular app from your Windows 8 device. To do so, you can use PowerShell and scripting to Perform a Clean Uninstall of the Windows Store app.
Completely Remove all Microsoft Store apps using PowerShell script
Note: I am not familiar with PowerShell, having used it for the first time now. But when I found my Windows Phone app constantly crashing in spite of having reinstalled it and trying other troubleshooting steps, I decided to use this script. This was the first time that I had opened PowerShell! It was only after some trial and error that I was able to get the script to work. Based on what I read at the TechNet Script Center post, this is the way I went about it. It worked for me and I hope it does for you too.
First, I recommend you create a system restore point.
Having done that you will have to allow active scripting on your Windows 8 computer. Because, by default, for security reasons, PowerShell’s execution policy is set to Restricted. This means that scripts won’t run. In such a scenario, if you try to run a script, you will get an error:
Running scripts is disabled on this system
Open Powershell as an administrator. To do so, while on the start screen, type powershell, and on the result, right-click and select Run as administrator.
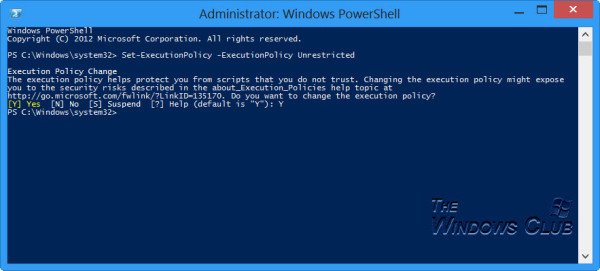
Type Set-ExecutionPolicy -ExecutionPolicy Unrestricted and hit Enter.
Type Y again as confirmation and hit Enter again. This will change the Execution Policy.
Now, download this script from Microsoft and extract the contents of the zipped file.
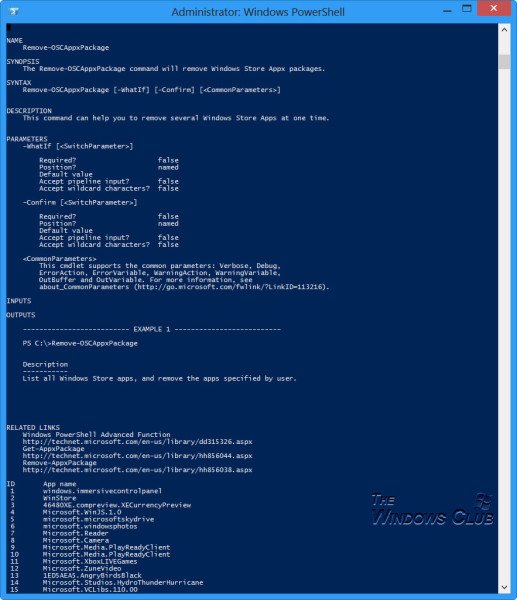
Open RemoveWindowsStoreApp with a Notepad. Scroll down to the end of the script file, and then add the command that you want to run – in this case, Remove-OSCAppxPackage. Save the script.
Next, run the script using PowerShell. Check the path. Change the directory if need be, Type cd C:\ and hit Enter. Then place the RemoveWindowsStoreApp on your C drive if need be.
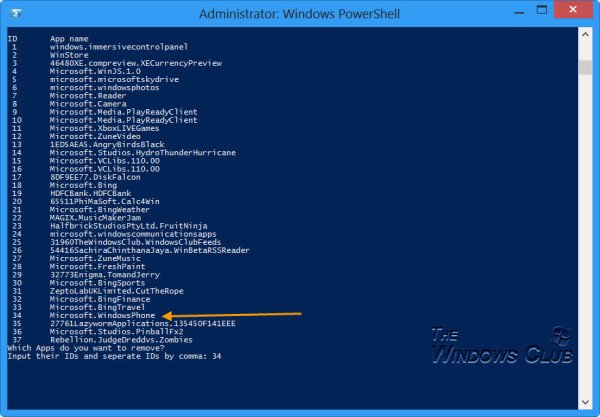
When you run the script, it will first list all the installed apps along with the app IDs.
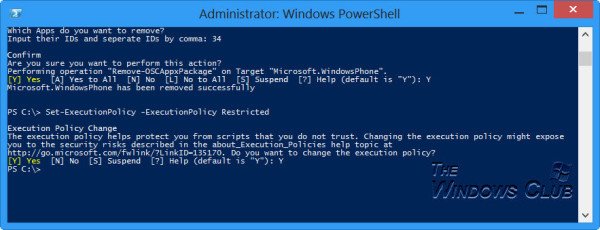
In my case, The Windows Phone app had the ID “34”.
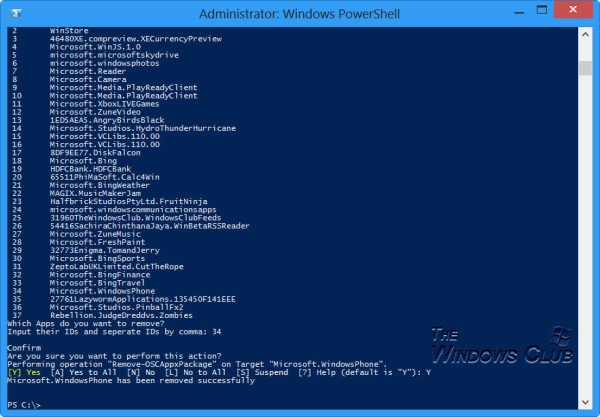
You will be asked Which Apps do you want to remove. Enter the ID or IDs and hit Enter. I entered 34 and hit Enter.
A Clean Uninstall will be performed and the app will be completely removed from your system.
Now restart the computer and reinstall the app. The app should hopefully work and not crash now.
Once your work is done, remember to change back the PowerShell Execution policy to Restricted using: Set-ExecutionPolicy -ExecutionPolicy Restricted.
I hope it helps!
Also read: Completely Uninstall Pre-Installed Microsoft Store Apps in Windows 11
BONUS TIP:
You can uninstall multiple Microsoft Store apps at once in Windows 10 using 10AppsManager.
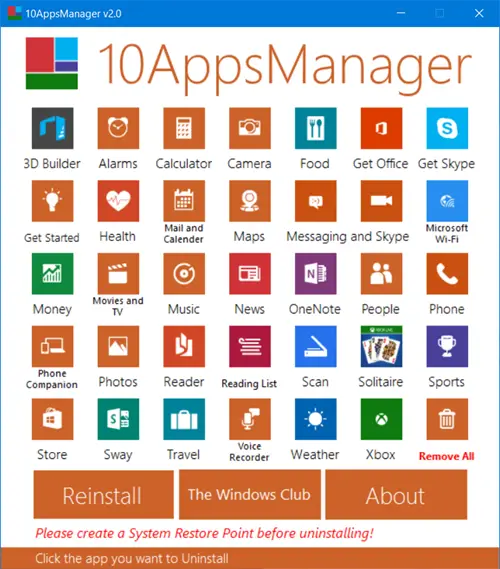
To uninstall Microsoft Store apps in Windows, you can use a good freeware like 10AppsManager, CCleaner, Store Applications Manager, or AppBuster.
If you are facing other kinds of problems with your Windows Store apps, you may want to check these links:
