We have noticed that Windows Terminal failed to select the font we selected. Even when we tried downloading the font for the terminal from the Control Panel and deploying it for every user, the Terminal couldn’t find it. In this post, we will see what you can do if Windows Terminal is unable to find the selected font.
Warning
Unable to find the selected font “Fixedsys Excelsior 3.01 Regular”.
“Fixedsys Excelsior 3.01” has been selected instead.
Please either install the missing font or choose another one.
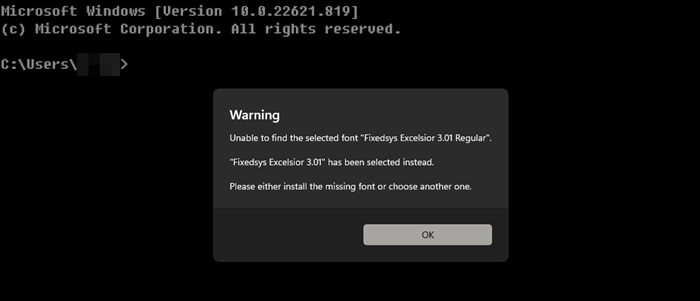
The font name and type can be different.
Fix Windows Terminal Unable to find the selected font
If Windows Terminal is unable to find the selected font, follow the solutions mentioned below to resolve the issue.
- Restart Windows Terminal
- Install font for all users
- Make sure Windows Font Cache Service is running
- Repair or reset Terminal
- Reinstall the installed font
Let us talk about them in detail.
1] Restart Windows Terminal
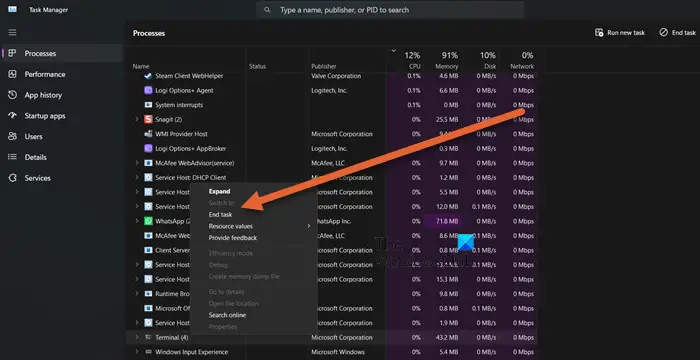
First, let us restart the Windows Terminal and then select the font. You must close the Terminal from the Task Manager, so, open the app, right-click on Windows Terminal, and select End Task. Now, open Terminal and check if the issue is resolved.
2] Install font for all users
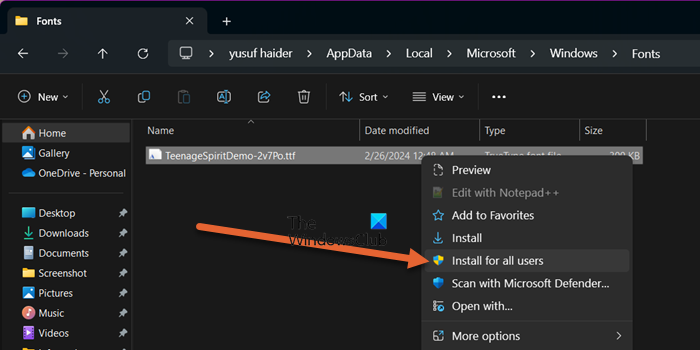
If you have installed the font face, but some other user on your machine is trying to access it, they will probably not be able to do it due to the lack of permission. Even if one single user is connected to your machine, let’s still try to be a little all-encompassing and install it for all the users. To do the same, you need to open File Explorer, navigate to %LOCALAPPDATA%\Microsoft\Windows\Fonts, right-click on the font that’s giving you issues, and select the Install for all users button. Let is install, you might be asked to give your permissions, so, do that, and check if you are getting the same error. This will most probably remedy the situation.
3] Make sure Windows Font Cache Service is running
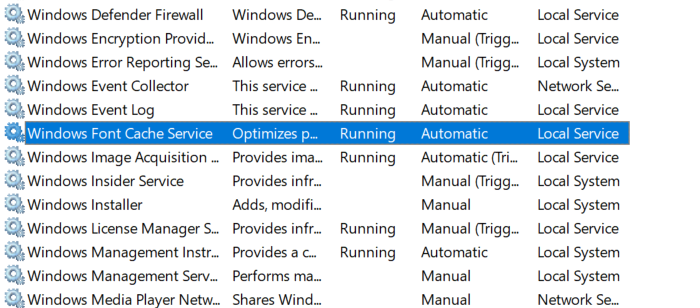
The Windows Font Cache Service manages and optimizes font caching on your computer to enhance the performance of font-based applications such as Terminal. In case the service is disabled, Windows Terminal won’t be able to detect any new font face. Hence, it is crucial to check and ensure the service is running. To do the same, open Services from the Start Search Menu, look for Windows Font Cache Service, and check if it’s running. In case it’s stopped, right-click on the service and select Start. Finally, reboot your computer. Hopefully, it will resolve the issue for you.
4] Repair or reset Terminal
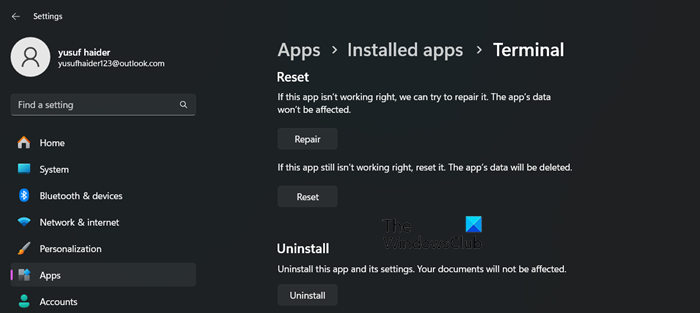
You need to repair or reset the Windows Terminal, as the issue can result from corruption and misconfiguration. To do the same, follow the steps mentioned below.
- Open Settings.
- Go to Apps > Installed apps.
- Search for “Windows Terminal”.
- Click on the three dots and select Advanced Options.
- Select Repair.
If this doesn’t work, click on Reset instead. Now, check if the issue persists.
5] Reinstall the installed font
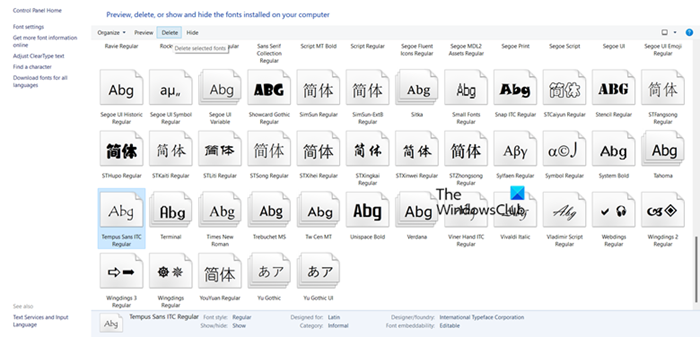
If nothing works, our last resort is to reinstall our installed font. That includes deleting the font completely from the Control Panel. You can follow the steps below to do the same.
- Open Control Panel by searching it out of the Start Menu.
- Now, change the View by to Large icons and click on Fonts.
- Look for the problematic font, select it, and click on Delete.
This will remove the font in question, to reinstall it, you need to go to the location where you have extracted it, double-click on the ttf file and click on Install. Finally, check if you can select the font in Windows Terminal.
Hopefully, these solutions will resolve the issue for you.
Read: How to reset Windows Terminal settings to default
How do I enable font in Windows Terminal?
To change font in Windows Terminal, you first need to go to Settings which you can see after clicking on the down arrow. Click on Profile > Appearance and then change the Font face.
Read: How to change font size and font-weight in Windows Terminal
How do I enable nerd font in Windows Terminal?
To use a Nerd Font with Oh My Posh and Terminal Icons, follow these steps:
- Open the Windows Terminal settings UI by clicking on Settings (Ctrl+,) in your Windows Terminal dropdown menu.
- Choose the profile where you want to apply the font (e.g. PowerShell) and navigate to the Appearance tab.
- From the Font face drop-down menu, select the Nerd Font you want to use with your customized prompt. CaskaydiaCove Nerd Font is a popular choice, but you can choose any Nerd Font that you prefer.
Read: Terminal vs PowerShell vs Command Prompt difference explained.
Leave a Reply