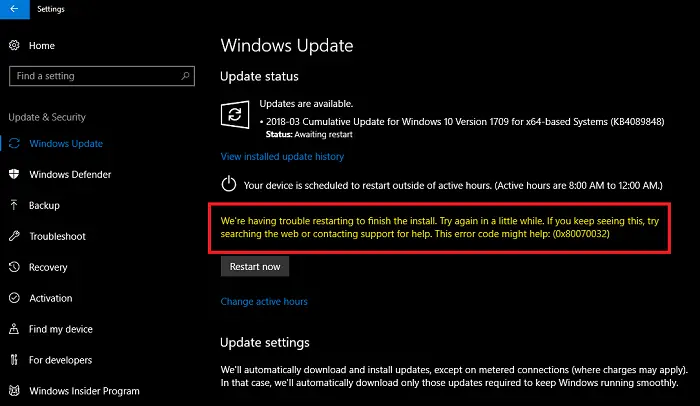
At times, while trying to update Windows, the process might get stuck and return the error code 0x80070032. with error message We’re having trouble restarting to finish the install. If you encounter the Windows Update error 0x80070032, read this article for the resolution.
Fix Windows Update Error 0x80070032

We’re having trouble restarting to finish the install (0x80070032)
The error is caused when a specific Windows update is stuck, and you need to pass through it. To resolve Windows Update error 0x80070032, try the following solutions sequentially:
- Restart the computer
- Uninstall the latest update
- Reset Windows Update components
- Run the Windows Update troubleshooter
1] Restart the computer
The first approach the solving this problem should be to simply restart the computer. If this helps, it could save you a lot of time.

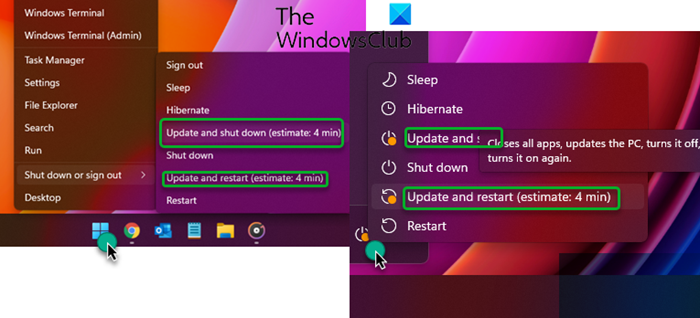
You could use the Restart button that you see in Settings or use the Update and shut down or Update and restart options from the WinX Menu or the Start Menu.
2] Uninstall the latest update
In case the latest update is problematic, or the file is corrupt, it will cause the Windows Update error 0x80070032. To resolve this error, simply uninstalling the current update will be helpful for most users. The procedure to uninstall updates on Windows 11 is as follows:
- Right-click on the Start button and select Settings.
- In the Settings window, go to the Windows Update tab on the list on the left-hand side.
- In the right pane, click on Update history. The Update history page will show the list of recent updates.
- If you scroll down a little, you will find the option to Uninstall updates.
- Click on it to open the page to open the Installed updates page in the Control Panel.
- Simply right-click on the latest updates and select uninstall.
3] Reset Windows Update components
If uninstalling the latest update doesn’t work, then you can consider resetting Windows Update components. Doing so will change the settings related to Windows Updates to default.
4] Run the Windows Update troubleshooter
The Windows Update troubleshooter is an excellent tool for diagnosing issues related to Windows Updates and resolving them if possible. The procedure to run the Windows update troubleshooter in Windows 11 is as follows:
- Right-click on the Start button and select Settings.
- In the Settings window, go to the System tab on the list on the left-hand side.
- In the right pane, scroll down and select Troubleshoot. In the next window, select Other troubleshooters.
- This will open the list of built-in troubleshooters for Windows 11.
- From the list, click on Run corresponding to the Windows Update troubleshooter.
The troubleshooter will start detecting problems and resolve them if in scope.
Please let us know if this helped you in the comment section.
NOTE: Error 0x80070032 can also be seen for – WslRegisterDistribution failed | Microsoft Store | When copying files | Windows Backup.
How do I fix Windows Update failed to install?
If Windows Update fails to install or will not download on Windows PC, then first, run the System File Checker and DISM tool, delete temporary files, use Windows Update troubleshooter, and try again. If that doesn’t help in any way, reset the Catroot folder, delete the SoftwareDistribution folder, and set the Windows Update service to Automatic or Manual, Background Intelligence Transfer Service to Manual, etc.
What is 0x80070032 file history?
Error 0x80070032 for File History occurs when you try to turn on the Automatic backup my files option. So, if you receive this error and want to fix the 0x80070032 backup error on your Windows PC, then delete the old backups, and then try again. You may also need to reset or delete all backup settings and reconfigure the File History backup to fix this error.
Hope this is helpful.
Leave a Reply