This post explains how to fix Windows Update Error 0x8007010b on a Windows 11/10 PC. Error 0x8007010b is a generic Windows error that can occur for various reasons, but it often relates to issues with file or directory permissions, corrupted system files, network or internet connectivity problems, or conflicts with other software.

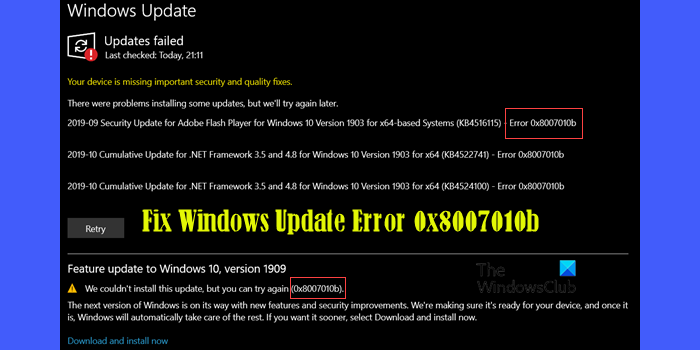
You may encounter the error while installing updates on your PC. This post will help you if you’re struggling with failed Windows 11/10 updates displaying the error 0x8007010b message that reads:
Updates failed
2019-09 Cumulative Update for .NET Framework 3.5 and 4.8 for Windows 10 Version 1903 for x64 (KB4514359) – Error 0x8007010b
or
We couln’t install this update, but you can try again (0x8007010b).
Fix Windows Update Error 0x8007010b
To resolve Windows Update Error 0x8007010b on your Windows 11/10 PC, use these fixes:
- Run DISM
- Run Windows Update Troubleshooter
- Download and manually install the update
- Reset the Windows Update Components.
You will need admin permission to apply any of these fixes.
1] Run DISM

DISM or Deployment Image Servicing and Management (DISM) is a command-line tool that is used to fix corrupt system files using an existing Windows Image. It can be used to stall, uninstall, configure, and update Windows features, packages, drivers, and more.
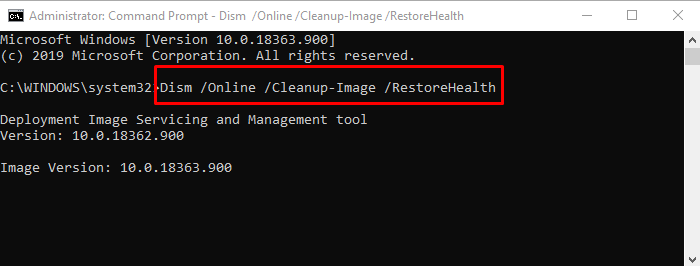
Open Command Prompt or PowerShell with Admin permission, and execute the command with options such as /ScanHealth, /CheckHealth, and /RestoreHealth
Dism /Online /Cleanup-Image /ScanHealth

Dism /Online /Cleanup-Image /CheckHealth

Dism /Online /Cleanup-Image /RestoreHealth
Execute the command one after the other, and give it enough time to complete. The last switch will make sure to fix any corruption related to system files such as the invalid directory and fix it.
2] Run Windows Update Troubleshooter

Windows offers a built-in troubleshooter that can fix typical Windows Update issues without you worrying much about it. You can find the Windows Update troubleshooter under the Windows Settings page. However, this MSDT-based troubleshooter is soon going to be deprecated and will redirect to the new Get Help-based troubleshooter. To manually launch the troubleshooter, follow these steps:
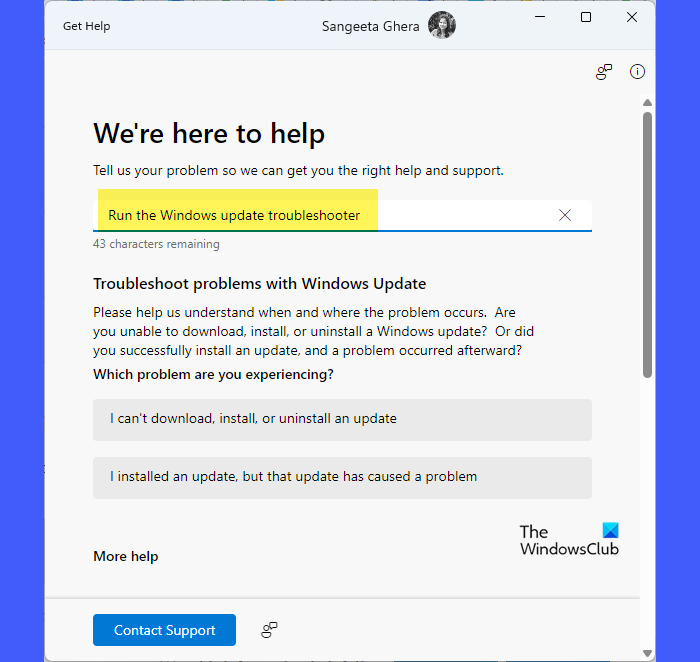
Type ‘get help’ in the Windows Search bar and click Open next to the Get Help app that appears on top of the search results.
In the Get Help dialogue, type ‘Run the Windows Update Troubleshooter’ and press Enter. The troubleshooter will appear. It will show you some options to further narrow down the issue and based on your response, it will suggest potential fixes.
Once the Wizard finishes fixing, try updating Windows 11/10 again, and check if the error doesn’t occur anymore.
3] Download and manually install the update

If you are not able to update that particular update manually, you can always download it from the Microsoft website and install it. Microsoft offers a Download Center for all the updates where you can search for that particular update using its ‘KB’ number and then download it. Once downloaded, you can install it just like any other software on Windows. You can also use Microsoft Update Catalog and WSUS Offline Update to update offline.
4] Reset the Windows Update Components

Windows Update is built of many components. It includes Background Intelligent Transfer, Windows Update Service, Cryptographic Services, and Application Identify Service. If any of the components are not working, the update may result in issues like this. It would be a good idea to reset these Windows Update Components – so do refer to this guide for full details.
Here is the summary of all the steps you need to take:
- Stop Windows Update Component Services
- Delete the qmgr*.dat files.
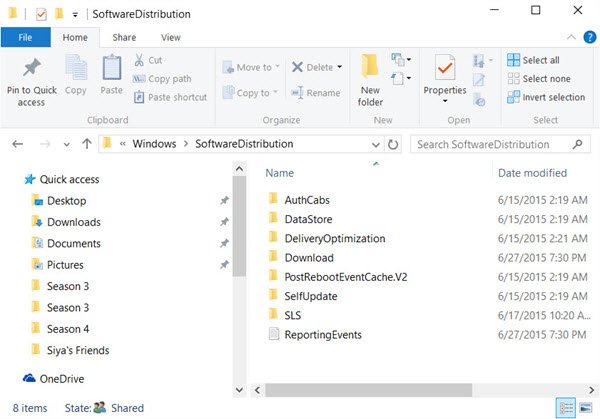
- Rename the SoftwareDistribution and catroot2 folders
- Reset the BITS service and the Windows Update service to the default security descriptor.
- Re-register the BITS files and the Windows Update-related DLL files.
- Delete incorrect Registry values
- Reset Winsock.
I hope the steps were easy to follow, and you were able to Fix Windows Update Error 0x8007010b.
Error 0x8007010b, ERROR_DIRECTORY, The directory name is invalid
The error message ‘The directory name is invalid. 0x8007010b (WIN32/HTTP: 267 ERROR_DIRECTORY)‘ typically occurs in Certificate Authority (CA) scenarios when there is a problem with the directory paths or permissions. Check the Event Viewer logs, particularly those related to CA for any error messages or warnings that provide detailed information about the cause of the error. Ensure that the directory paths configured for the Certificate Authority are correct and accessible and the CA service account has appropriate permissions to read from and write to these directories.
What is scheduled task error 0x8007010b?
Scheduled Task error 0x8007010b, often accompanied by the message ‘The directory name is invalid’, indicates an issue with the directory specified in the scheduled task’s settings. This error occurs when the system attempts to execute a task but fails due to an invalid or inaccessible directory path. In order to fix this issue, you should check and modify the directory path that is mentioned in the settings of the scheduled job and make sure that the account executing the task has the necessary rights to access the directory.
How do I fix Windows Update download error?
If you’re experiencing a Windows Update download error, make sure your device is connected to the internet and there are no connectivity issues. Also, make sure that your device has enough free space on the drive where updates are downloaded. Then try running the Windows Update Troubleshooter, restarting the Windows Update service, and resetting the Windows Update components. If the update still fails to download, try downloading them from the Microsoft Update Catalog website and install them manually.
Read Next: Windows Update fails to install or will not download in Windows.