If you receive a Windows Update error 0x80070490 while updating your Windows operating system, here are a few steps you could try to help resolve the issue. This error can occur if your System component store or Component-Based Servicing (CBS) manifest has been corrupted.

0x80070490 -2147023728 E_PROP_ID_UNSUPPORTED Permission denied / [Problem initializing or using session variables] or Element not found
Fix Windows Update error 0x80070490
If you see Fix Windows Update error code 0x80070490 while updating your Windows 11 or Windows 10 computer, try the following suggestions:
- Run the Windows Update Troubleshooter
- Check Windows Update Services
- Run DISM to repair Windows Updates
- Manually Reset Windows Update Components to default
- Create a new User Account.
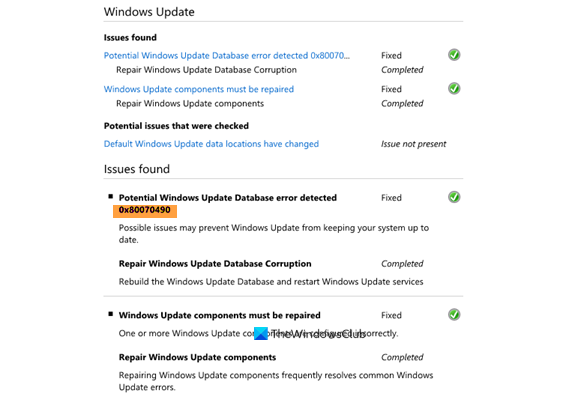
1] Run the Windows Update Troubleshooter

Run the Windows Update Troubleshooter and see if that helps. It has been known to help in most cases.
2] Run DISM to repair Windows Updates
In Windows 11, Windows 10, Windows 8.1 and Windows 8, you should run the DISM Tool to repair system image and restore system health, and see if that helps. Our Ultimate Windows Tweaker can help you run them with a click. The command to be used in an elevated command prompt is:
DISM.exe /Online /Cleanup-Image /RestoreHealth
When you run it, the DISM Tool will use Windows Update to provide the files that are required to fix corruption. But if your Windows Update client itself is broken, KB958044 says that you will have to use a running Windows installation as the repair source, or use a Windows side-by-side folder from a network share or from a removable media, such as the Windows DVD, as the source of the files, and then use the following command instead:
DISM.exe /Online /Cleanup-Image /RestoreHealth /Source:C:\RepairSource\Windows /LimitAccess
Here you will have to replace C:\RepairSource\Windows with the location of your repair source.
If you are running Windows 7 or Windows Vista, after running the System File Checker, you should use the System Update Readiness Tool to repair Windows Update.
Related post: Windows Upgrade error code 0x80070490 – 0x20007.
3] Check Windows Update Services
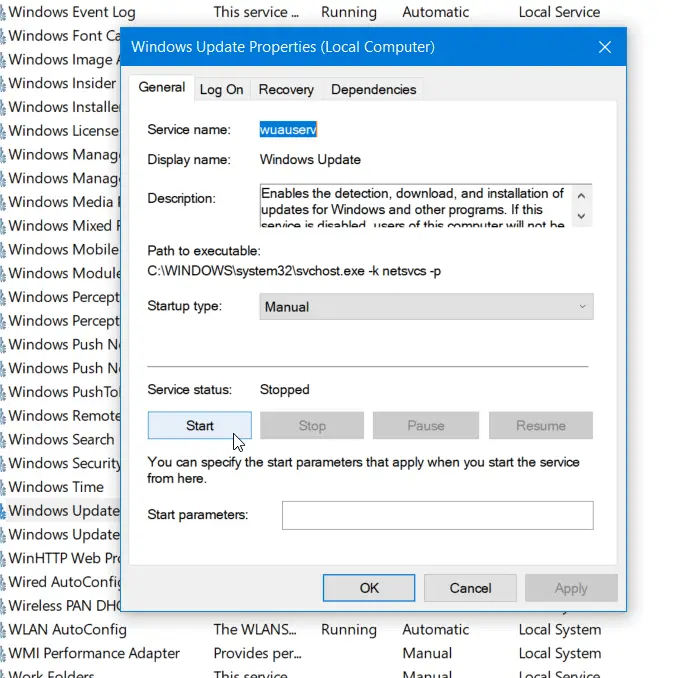
Open Windows Services Manager and check the Windows Update related Services like Windows Update, Windows Update Medic, Update Orchestrator Services, etc are not disabled.
The default configuration on a standalone Windows 11/10 PC is as follows:
- Windows Update Service – Manual (Triggered)
- Windows Update Medic Services – Manual
- Cryptographic Services – Automatic
- Background Intelligent Transfer Service – Manual
- DCOM Server Process Launcher – Automatic
- RPC Endpoint Mapper – Automatic
- Windows Installer – Manual.
This will ensure that the required Services are available.
Apart from the direct service, you should find the dependencies of Windows Update service and ensure if they are running or not.
To get started, search for “services” in the Taskbar search box and click on the search result. After opening the Services window, find out Windows Update, DCOM Server Process Launcher, and RPC Endpoint Mapper. Check if they are running or not.

If not, you need to start those services one after one.
4] Manually Reset Windows Update Components to default
Use the Reset Windows Update Agent Tool and see if it helps you. This PowerShell script will help you Reset Windows Update Client. See this post if you want to manually reset each Windows Update component to default.
5] Create a new User Account
Create a new User Account and see if that works for you.
More suggestions here to fix Windows Update problems.
All the best.