While updating Windows, you may often come across different types of Update error codes in which some errors are easy to solve while others take a little while to be fixed. Recently, some Windows 11/10 users reported Update Errors 0x800f0988, 0x80073701, 0x800f081f or 0x800f08a during the installation of a Cumulative Update on their computer. Due to having this issue, you may find it difficult to install the latest security updates and features on your computer.

This error basically occurs when you try to install the latest update Windows Updates on your computer. With this error code, you could see the following error message:
There were some problems installing updates, but we’ll try again later. If you keep seeing this and want to search the web or contact support for information, this may help: (0x800f08a)
In this guide, we are going to explain all the possible ways that will help you to fix this error code.

Fix Windows Update Error 0x800f08a
If you’re facing any of these Windows 11/10 Update Errors when installing Windows update, you may follow the below suggestions to get rid of this issue:
- Run the Windows Update Troubleshooter
- Manually download and install the update
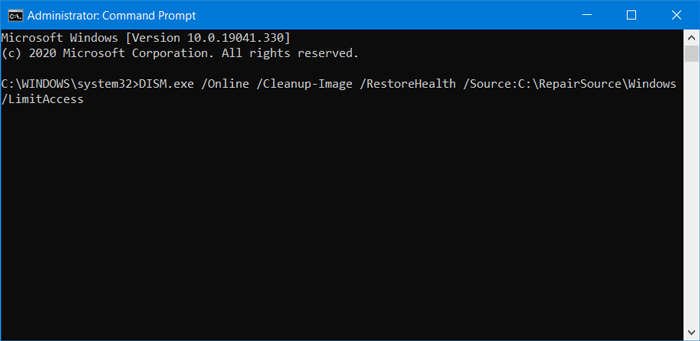
- Run DISM to fix Windows Update system files
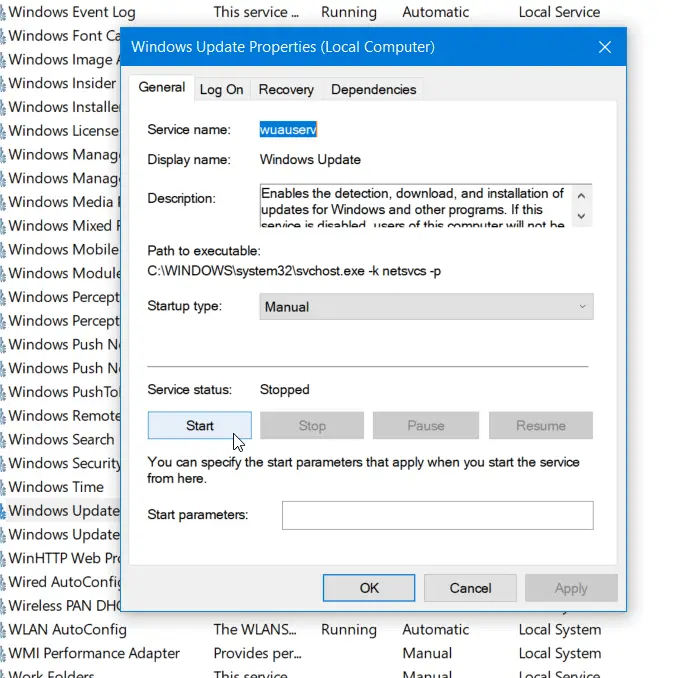
- Check the status of all Windows Update Services
- Reset the Windows Update Components.
Let’s now see them in detail. I would like to suggest you try these solutions one after another.
1] Run the Windows Update Troubleshooter
You first need to run the Windows Update Troubleshooter using the below instructions and see if that fixes the error 0x800f08a.
In Windows 11:
- Open the Windows Settings > System > Troubleshoot > Additional troubleshooters.
- Locate Windows Update Troubleshooter
- Now hit Run the troubleshooter and let the Windows fix the problem automatically.
- Once it completes the process, close the settings window, and restart your device.
In Windows 10:
- Open the Windows Settings > Updates and Security > Troubleshoot > Additional troubleshooters.
- Go to the right pane and select Windows Update.
- Now hit Run the troubleshooter and let the Windows fix the problem automatically. It may take a little while to detect the problems, so keep patience.
- Once it completes the process, close the settings window, and restart your device.
If troubleshooting the Windows Update doesn’t fix the problem, continue with the next effective solution.
2] Manually download and install the update
This solution entails you manually download from the Microsoft Update Catalog, the update that is failing to install and consequently triggering the Windows Update Error 0x80070bc2 and then install the update on your Windows PC.
3] Run DISM to fix Windows Update system files

Deployment Image Servicing and Management or DISM tool can help you fix corrupt Windows Update system files. As it is a preinstalled command-line tool, you do not need to install it for this purpose. That being said, you should follow our details tutorial to fix corrupt Windows Update system files using the DISM tool.
4] Check the status of all Windows Update Services
There are three services you should check when you are getting this error code. They are –
- Windows Update,
- DCOM Server Process Launcher, and
- RPC Endpoint Mapper.
The first one is directly linked to Windows Update, and the last two services are the dependencies.
Apart from the direct service, you should find the dependencies of Windows Update service and ensure if they are running or not.
To get started, search for “services” in the Taskbar search box and click on the search result. After opening the Services window, find out Windows Update, DCOM Server Process Launcher, and RPC Endpoint Mapper. Check if they are running or not.

If not, you need to start those services one after one.
5] Reset the Windows Update Components
Unfortunately, if the Windows Update error 0x800f08a is still unresolved, you can reset the Windows Update Components to default and check if the problem is solved now.
I hope this guide helped you to solve the issue.
Leave a Reply