You may notice that when you try to install the latest Windows updates on your computer, you may receive the error code 0x80246010. If so, then this post is intended to help you. In this post, we will identify the possible causes of the Windows Update error 0x80246010 as well as provide the appropriate solutions you can try to remediate the issue.

You might encounter the Windows update error 0x80246010 due to one or more (but not limited to) of the following known causes;
- System File corruption.
- Windows Update glitch.
- Essential Windows Update services are disabled.
Fix Windows Update error 0x80246010
If you encounter the Windows Update error 0x80246010, you can try our recommended solutions presented below in no particular order to resolve the issue.
- Run Windows Update Troubleshooter
- Enable essential Windows Update services
- Clear the Windows Update cache
- Run SFC and DISM scan
- Download the update from Microsoft Update Catalog
Let’s take a look at the description of the process involved concerning each of the listed solutions.
1] Run Windows Update Troubleshooter

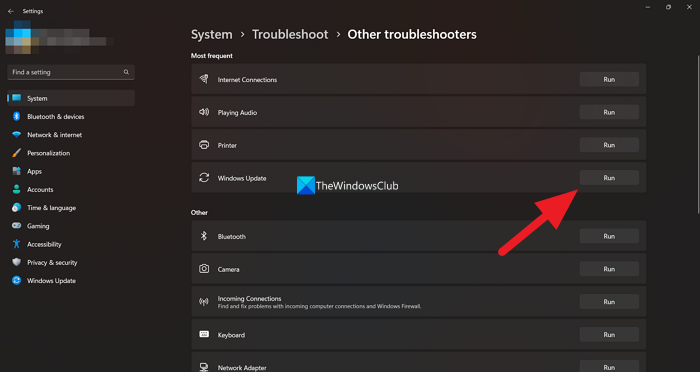
Windows Update Troubleshooter is an automated tool in Windows 11/10 that fixes Windows Update-related issues. We suggest you run the built-in Windows Update Troubleshooter and see if that helps to resolve the Windows Update error 0x80246010 issue.
2] Enable essential Windows Update services
Windows Update fails if the essential services are disabled or not running on your system. Therefore, your next step is to enable the essential services for Windows Update.
Press the Windows key + R to invoke the Run dialog. In the Run dialog box, type cmd and then press CTRL + SHIFT + ENTER to open Command Prompt in admin/elevated mode.
In the command prompt window, type the command below in that order and hit Enter after each line to set the Startup type of each service to Automatic:
SC config trustedinstaller start=auto
SC config bits start=auto
SC config cryptsvc start=auto
After the command executes and the services are started, restart your computer and see if the issue has been resolved on the next full boot. If not, continue with the next solution.
Read: Windows could not start the Windows Update service on Local Computer
3] Clear the Windows Update cache

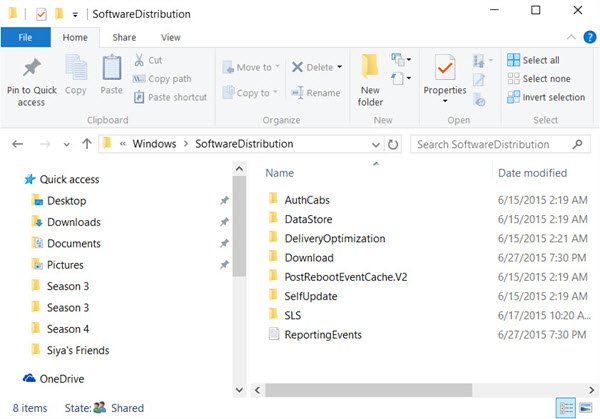
The Software Distribution folder in the Windows 11/10 operating system is a folder located in the Windows directory and used to temporarily store files that may be required to install Windows Update on your computer. This solution requires you clear the contents of the Software Distribution folder and then retry the update process again.
Read: Windows Update fails to install or will not download
3] Run SFC and DISM scan
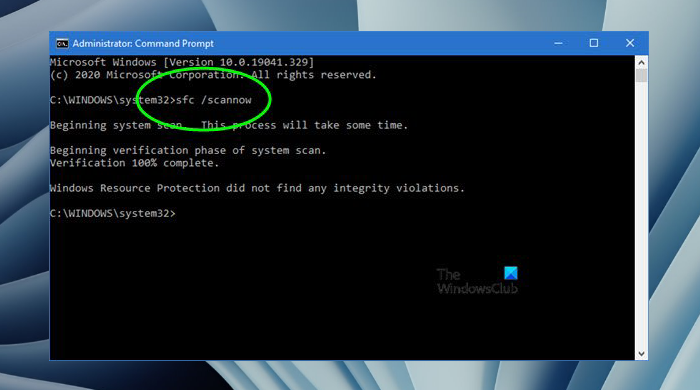
If you have system file errors, you may encounter the Windows error 0x80246010. The SFC/DISM is a utility in Windows that allows users to scan for corruptions in Windows system files and restore corrupted files.

For the purposes of ease and convenience, you can run the scan using the procedure below.
- Press Windows key + R to invoke the Run dialog.
- In the Run dialog box, type notepad and hit Enter to open Notepad.
- Copy and paste the syntax below into the text editor.
@echo off
date /t & time /t
echo Dism /Online /Cleanup-Image /StartComponentCleanup
Dism /Online /Cleanup-Image /StartComponentCleanup
echo ...
date /t & time /t
echo Dism /Online /Cleanup-Image /RestoreHealth
Dism /Online /Cleanup-Image /RestoreHealth
echo ...
date /t & time /t
echo SFC /scannow
SFC /scannow
date /t & time /t
pause
- Save the file with a name and append the .bat file extension – eg; SFC_DISM_scan.bat.
- Repeatedly run the batch file with admin privilege (right-click the saved file and select Run as Administrator from the context menu) until it reports no errors.
- Restart your PC.
Any of these solutions should work for you!
How do I restart a failed Windows Update?
You can restart the failed Windows Update by clicking on the Retry button on the Windows Update page. If this does not work, restart your computer and then try installing the update again. Corrupt Windows Update cache files can cause Windows Updates to fail. Hence, clearing the Windows Update Cache resolves most Windows Update issues.
How to update Windows 11 manually?
You can easily update Windows 11/10 manually, provided the update is released by Microsoft. Open Windows 11/10 Settings and go to the Windows Update page. Now, click on the Check for updates button. Windows 11/10 will then start checking for updates. If the update is available, your system will start downloading it automatically.
Read next: Fix 0x8024a203 Windows Update Error.