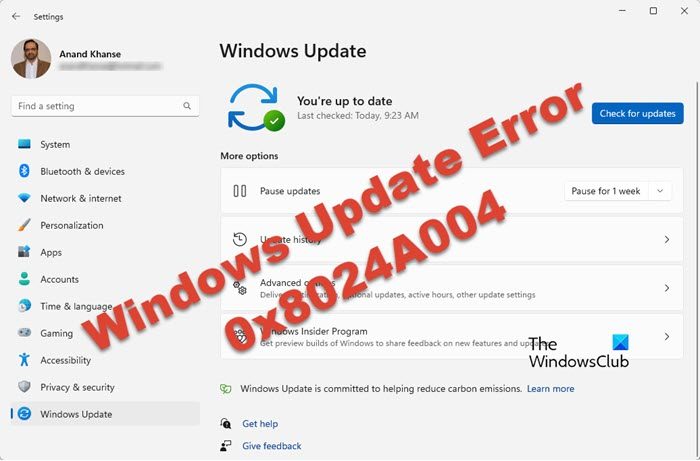
According to some users, Windows Update Error 0x8024A004 is stopping them from updating to the latest version of the Operating System. According to them, Windows is able to download the update but shows an error message when installing the same. More often than not, this error code appears when updating to the late Feature Update like from Windows 11 2022.
0x8024A004 – WU_E_AU_PAUSED, Automatic Updates was unable to process incoming requests because it was paused.

What causes Windows Update Error 0x8024A004?
Windows Update Error 0x8024A004 is mostly when updating from Windows 11 22H1 to 22H2. More often than not, this is caused either if the Windows Services configuration has got disturbed or if the Windows Update-related files have become corrupted. Error 0x8024A005 is another code that can appear along with 0x8024A004.
Fix 0x8024A004 Windows Update error
If you encountered Windows Update Error 0x8024A004, follow the solutions mentioned below to resolve the issue.
- Run Windows Update Troubleshooter
- Unpause Windows Update
- Check the status of all Windows Update related Services
- Use DISM to repair Windows Update components
- Reset Windows Update Component
- Install Windows 11 Feature Update using ISO
Let us talk about them in detail
1] Run Windows Update Troubleshooter

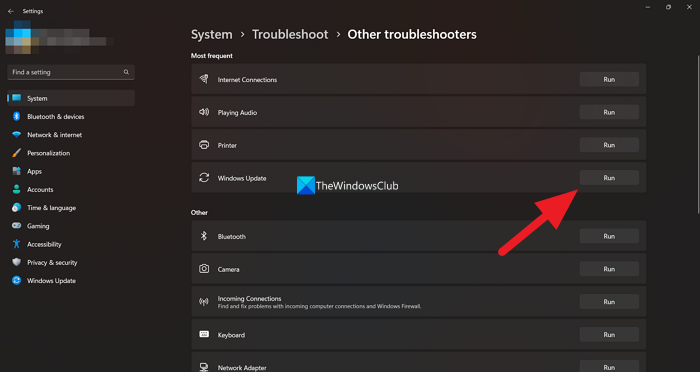
Let us start troubleshooting by deploying a built-in utility, Windows Update Troubleshooter, that will resolve the Windows Update easily. Windows Update troubleshooter can be used to resolve any issue related to Windows Update. In order to run the troubleshooter, follow the prescribed steps.
- Open Settings from the Start Menu.
- Go to System > Troubleshoot.
- Click on Other troubleshooters.
- Go to Windows Update and click on the Run button.
Windows 10
- Open Settings.
- Go to Update & Security > Troubleshoot.
- Click on Additional troubleshooter.
- Select Windows Update and click on Run the troubleshooter.
Let the utility scan and resolve the issue. Hopefully, this will do the job for you.
Read: Windows Update Troubleshooter not working
2] Unpause Windows Update

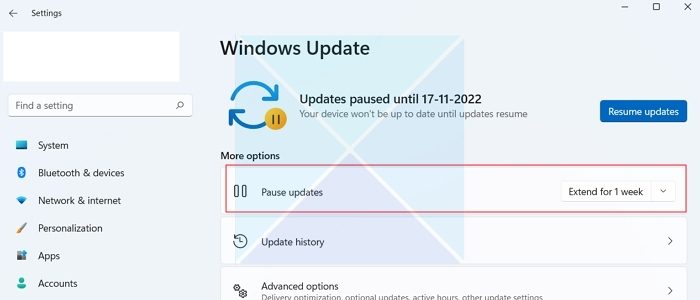
The primary reason behind the 0x8024A004 error code is that you have probably paused Windows updates. As a result, Windows faces trouble updating itself. So make sure you have not paused Windows updates. If you did so, resume the updates and see if it worked.
If you didn’t pause Windows updates, you can try pausing the update and resuming it after some time. To do so, follow these steps:
- Go to Windows Settings.
- Click on Windows Update from the sidebar.
- Over here, check if you have paused Windows updates. If you did so, click on the Resume updates to allow Windows to start downloading updates.
- If you haven’t paused updates, click on Pause for 1 week to pause the updates. Then, resume the updates and see if it worked for you.
3] Check the status of all Windows Update related Services

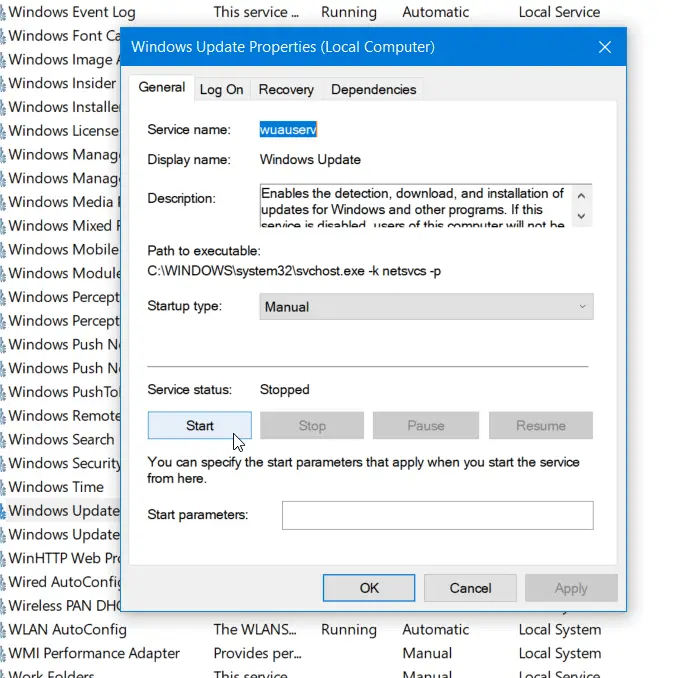
Open Windows Services Manager and check the Windows Update related Services like Windows Update, Windows Update Medic, Update Orchestrator Services, etc are not disabled.
The default configuration on a standalone Windows 11/10 PC is as follows:
- Windows Update Service – Manual (Triggered)
- Windows Update Medic Services – Manual
- Windows Installer – Manual.
- Cryptographic Services – Automatic
- Background Intelligent Transfer Service – Manual
- DCOM Server Process Launcher – Automatic
- RPC Endpoint Mapper – Automatic
To get started, search for “services” in the Taskbar search box and click on the search result. After opening the Services window, check if they are running or not. If not, you need to start those services one after one.
4] Use DISM to repair Windows Update components
If all the services are working as they should, you need to run DISM to repair Windows Update Components. To do the same, open Command Prompt with administrative privileges, and now, execute the following command.
DISM.exe /Online /Cleanup-image /Restorehealth
Once the command is executed, your issue should be resolved. In case, the issue still persists, run the following command.
DISM.exe /Online /Cleanup-Image /RestoreHealth /Source:C:\RepairSource\Windows /LimitAccess
You need to be patient as the process will take some time. Once the command has done its job, go ahead and check for updates. Hopefully, your issue will be resolved.
5] Reset Windows Update Components
DISM command is capable of repairing the Windows Components, however, it can fail to do its job at times, in that case, we need to clear out the WU Components as they will be automatically recreated. There are some Windows Update Components that you need to reset if the aforementioned solution fails to resolve the issue for you. We recommend you manually reset the Windows Update Components to default and then click on Check for Updates in Windows Update. Hopefully, removing the corrupted components will do the job for you
6] Install Windows 11 22H2 using its ISO
If nothing worked, your last resort is to use download the Windows 11 22H2 ISO file and install it on your computer. All you have to do is download Windows 11 22H2 or 2022 ISO file and then just go to the location where all the files are downloaded, run the Setup file, and follow the on-screen instruction to update your Windows. However, this is a lengthy process and is not really a solution, instead, it is a workaround, which is why we recommend you try this if all the other answers failed.
If you face this issue while installing a Windows Update, then download & install the KB update manually. This is sure to help.
Hopefully, you are able to resolve the issue using the solutions mentioned in this post.
Also Read: Windows 10 22H2 Update not installing
How to fix Windows Update Error?
Windows Update errors can be resolved by using the built-in Windows Update troubleshooter, you can check the first solution if you want to learn how to deploy that tool. If that doesn’t work, check other solutions mentioned in this post. You should also go to our guide to know what should be done if Windows Update is not installed on your computer.
Read: Fix 0x800f0806 Error while downloading Windows 11 Updates.