No matter where we are and what we are doing, we always search for a wireless network in the range. Imagine that you have to work on your system, there is a wireless connection available nearby but you can’t connect to it. This type of problem can occur at times. In this article, we will show you how to fix The Windows Wireless Service is not running on this computer error in Windows 11/10. You will see this error when you run a Network Troubleshooter, and the results show that it was unable to fix this issue.
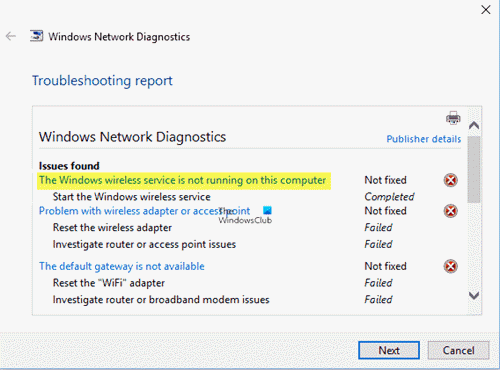
Windows Wireless Service is not running on this computer
If you receive The Windows Wireless Service is not running on this computer error on your Windows 11/10 PC, and this Windows Service will not start, try these suggestions:
- Check WLAN AutoConfig service
- Perform SFC scan
- Update Network Drivers
- Reset Winsock
- Use Network Reset.
Before you perform any of the above methods, please create a system restore point.
1] Check WLAN AutoConfig service
To keep our system up and running, we should always keep the necessary services working. Our windows environment is full of micro and macro services. These services are the main reason behind the proper working of our operating system.
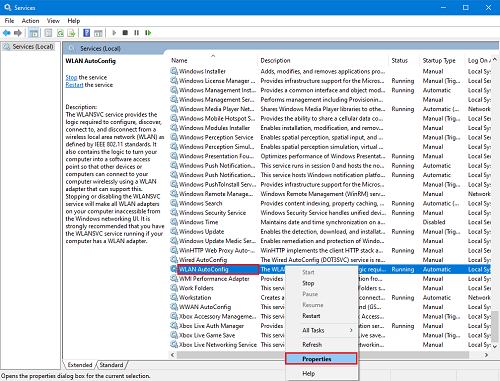
- Press Win + R keys. The Run window will open up.
- Type services.msc and hit Enter to open the Services Manager.
- Look for WLan AutoConfig service. Check if the Status of the service is set to Running or not.
- If not then right-click on the service and click on Properties.
- Now change the Startup type to Automatic and Start the service.
- Click on Apply and then click on OK.
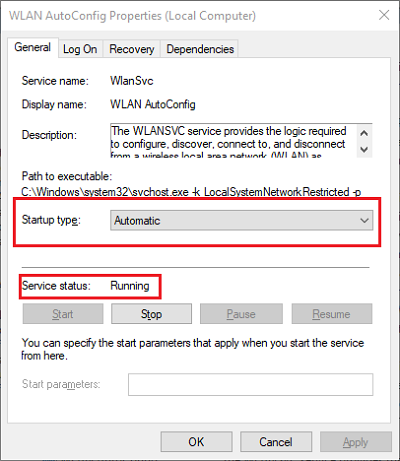
Check if you can connect to the wireless connection or not.
This post will help you if you receive Windows could not start the WLAN AutoConfig Service message.
2] Perform SFC scan
The SFC scan command scans all protected system files, and replace corrupted files with a cached copy of the same. Using this command is like performing troubleshooting method but on a command line and more effective.
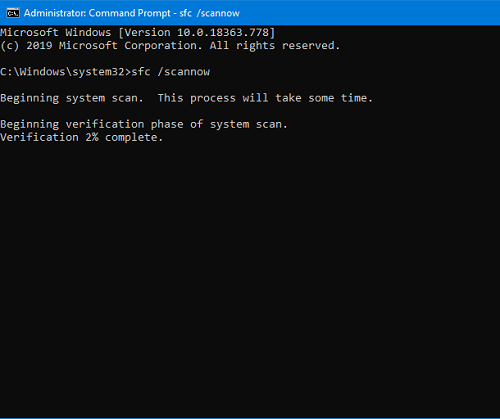
Open Start menu and type cmd. Click on Run as administrator.
In Command Prompt, type the following command and hit enter.
sfc /scannow
Now, wait for the command to finish the process and restart your system.
Now try reconnecting to your wireless network.
3] Update Network Drivers
Outdated and/or faulty drivers are the reason behind most of the problems we face in our system. The only thing you can do is update the Bluetooth and Network drivers.
- Press Win + X keys. The Quick Access menu will open up.
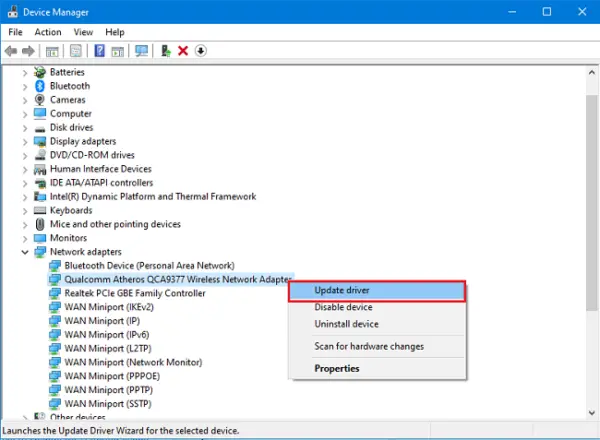
- Click on Device Manager.
- In Device Manager window, look for Network adapters and click on it to enlarge the tree.
- Look for the wireless adapter responsible for the connection, right-click on it and click on Update driver.
- In the update window, click on Search automatically for updated driver software.
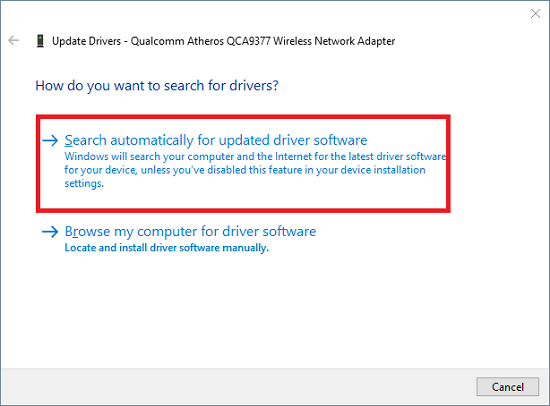
If the updates are available then it will automatically install them. When the process is over, try connecting to the wireless network again.
Please make sure that your system is set to the automatic installation of updates. If it’s not then this method will not work.
Read: How to fix WiFi problems?
4] Reset Winsock
The last resort for you is to reset all the network configurations. Resetting Winsock will clear and reset all the network settings which didn’t allow you to connect to the network.
Open Start menu and type cmd. Click on Run as administrator.
In the Command Prompt window, type the following command and hit enter:
netsh winsock reset
Once the process is completed, restart the system.
5] Run Network Reset
If nothing helps, you may need to use the Network Reset options via Settings.
Let us know in the comments below which of these methods were useful to you.
Related read: Network & Internet connection problems.