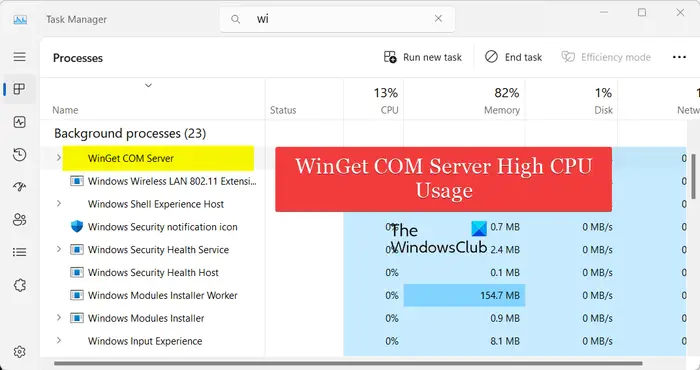
If WinGet COM Server consumes high CPU and power resources in Windows 11/10 PC, here are some tips that could help you troubleshoot the issue. Although you may be able to solve this problem by restarting your computer, you can also follow these solutions if that doesn’t work.

What is WinGet COM Server?
WinGet is a command line interface (CLI) that Windows uses when updating or installing apps. WinGet COM Server is a related process that runs in the background whenever something is updated or installed.
When WindowsPackageMangerServer.exe accesses the network, WinGet COM Server is usually launched. The file path to WindowsPackageMangerServer.exe is:
C:\Program Files\WindowsApps\Microsoft.DesktopAppInstaller_1.20.2201.0_x64__8wekyb3d8bbwe\WindowsPackageManagerServer.exe
WinGet COM Server High CPU or Power usage
To fix WinGet COM Server high CPU or Power usage, follow these tips:
- Disable WINGET installed apps from opening at startup
- Update App Installer via Microsoft Store
- Update apps installed via WINGET
- Use the upgrade command
- Re-register WINGET using PowerShell
- Temporarily turn off WINGET sources
- Run Windows Memory Diagnostic tool
- Troubleshoot in a clean boot state.
Before you begin, you can try running SFC and DISM scans and check if the problem is gone.
1] Disable WINGET installed apps from opening at startup
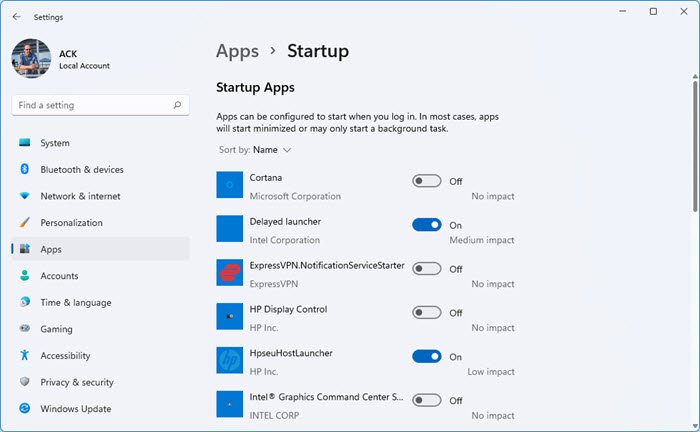
It is the very first thing you need to do when such a thing is consuming unnecessary resources. If you do not do that, you may be unable to use your computer smoothly since your PC might hang a lot due to having a low amount of available CPU resources. You need to remember the apps you installed using WINGET and follow this guide to disable those startup programs.
2] Update App Installer via Microsoft Store
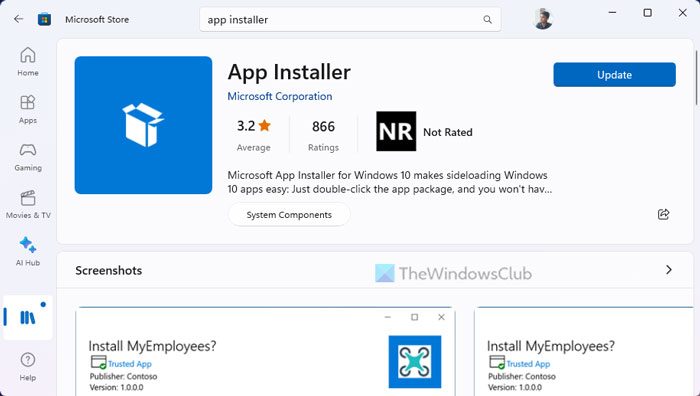
App Installer is directly related to WINGET since WINGET uses App Installer to fetch and install apps on your computer. If the App Installer has some issues or you have an old version of App Installer, it is suggested to update the package. To update the App Installer, follow these steps:
- Open the Microsoft Store on your computer.
- Search for app installer.
- Click on the individual search result.
- Click on the Update button.
3] Update apps installed via WINGET
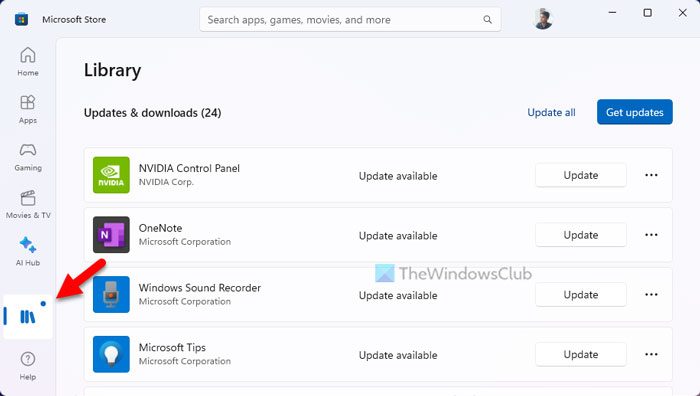
Once the App Installer package is updated to the newest version, it is time to update all the other WINGET-powered apps. You can use Microsoft Store to get the job done. Therefore, follow these steps to update apps installed via WINGET:
- Open the Microsoft Store on your PC.
- Click on the Library option in the bottom-left corner.
- Find the apps you installed via WINGET.
- Click the respective Update buttons.
4] Use the upgrade command
A few affected users have reported that using the WinGet upgrade command helped them fix the issue. You can also try doing the same and see if it helps. Here’s how:
First, launch Windows PowerShell with admin rights and then enter the below command in it:
winget upgrade --all
The above command will update all the applications that have upgrades available. Once done, you can check if the issue is gone.
5] Re-register WINGET using PowerShell
At times, your PC might come across this problem when there are some issues with the Windows Package Manager. In such a situation, you can try re-registering WINGET. For that, you can use a simple PowerShell command.
To get started, open the PowerShell with administrator permission.
Then, enter this command:
Add-AppxPackage -DisableDevelopmentMode -Register "C:\Program Files\WindowsApps\Microsoft.Winget.Source_2022.411.2307.604_neutral__8wekyb3d8bbwe\AppxManifest.xml"
Don’t forget to replace the Winget path with the original one that is available on your computer. You can find the exact path at this location:
C:\Program Files\WindowsApps\Microsoft.Winget.Source_[version-number]
Read: How to Re-register Microsoft Store Apps
6] Temporarily turn off WINGET sources
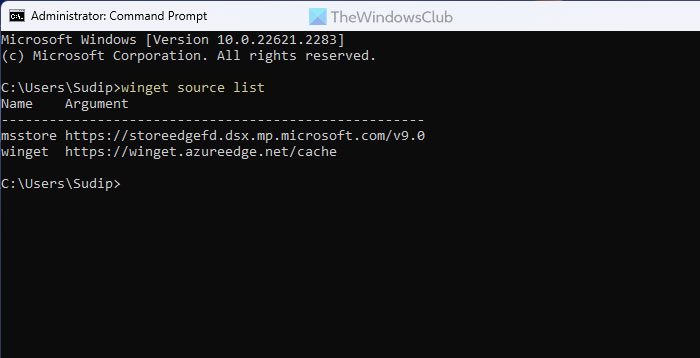
There are mainly two WINGET sources available on most Windows 11/10 computers. If there is an ongoing data leak, you might find the aforementioned issue. That is why it is suggested to temporarily turn off or block WINGET sources and check if it helps or not. For that, do the following:
- Open Command Prompt with administrator privileges.
- Enter this command:
winget source list - Note down the source list.
- Enter this command:
winget source disable [source-name]
If you want to re-enable the source in the future, use this command:
winget source enable [source-name]
7] Run Windows Memory Diagnostic tool
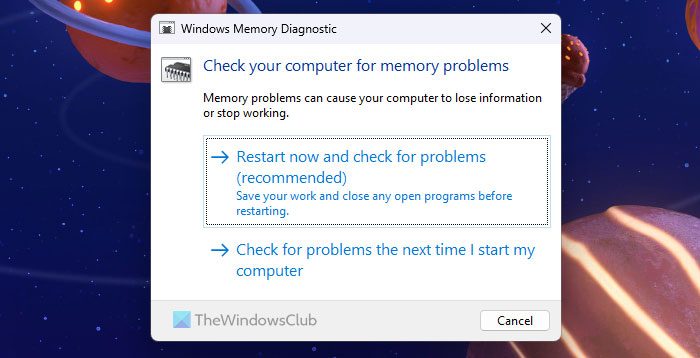
As hardware resources are involved in this problem, it is better to check your RAM as well. At times, this problem might occur due to having issues with the Memory. Thankfully, Windows 11/10 comes with an in-built tool, allowing users to run a test without any expert knowledge. It is called the Windows Memory Diagnostic tool. You can follow this guide to run Windows Memory Diagnostic Tool in Windows 11/10 to fix this problem.
8] Troubleshoot in a clean boot state
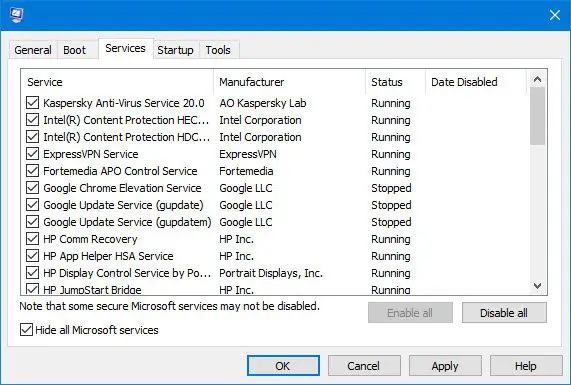
You can also try running Windows in a clean boot state and check if it helps. There might be some third-party service conflicting with WinGet and causing the issue. So, in clean boot, you can run Windows with an essential set of drivers and services. If the problem is resolved, you can start enabling third-party services one by one and analyze the process causing the problem. Once identified, you can temporarily disable or permanently uninstall it to resolve the issue.
That’s it! I hope it helped.
Read: Winget not recognized in Windows 11
How do I fix high CPU usage on my server?
The best way to fix high CPU usage on your server is to find and analyze the event log file. Every PC or server has an event log, which stores all the information regarding all the processes running in the background and foreground. You need to know which process does what and go through that source to eliminate this problem.
Why is my WMI Provider Host using so much CPU?
The high CPU usage of the WMI Provider Host (WmiPrvSE.exe) process could be caused due to corrupted system files, an issue with the WMI Provider Host service, or software conflicts. It could also be malware disguising itself as a genuine process. So, check the location of WmiPrvSE.exe and make sure it is located in the Windows/System32 folder.
Now read: Microsoft Common Language Runtime native compiler high CPU.
Is high CPU usage good or bad?
Obviously, it is only good some of the time. Your PC might sometimes confront such a problem when you run multiple apps simultaneously. If you want to do that intentionally, it is fine since you are getting your job done. However, if a particular app consumes more resources than usual – even in the standby mode, it is obviously not a good sign.
Read: How to Export or Import Installed software list using WINGET.
Leave a Reply