Compared to a Wired Printer, Wireless Printer sounds attractive, and since it can be accessed from any device, it adds to the convenience. Most Wifi printers are connected to the Home Network and work as expected, but not every time. Like the Wired Printers, Wireless printers come with their own issues. While you can see them on the network, they don’t print, or they become irresponsive when a setting is accessed. This guide will help you fix issues when the wireless printer is not responding. Knowing these will increase your chances of fixing the printer without calling someone.

Fix Printer not responding on Windows 11/10 PC
Follow these suggestions to fix a not-responding Wired or Wireless printer on a Windows computer. While most of the suggestions apply to a WiFi printer, some apply to a Wired printer. You need to use an admin account to carry out some of these fixes.
- Perform Basic Check
- Restart Printer, PC, and Wifi Router
- Run the Printer Troubleshooter.
- Make printer IP address static.
- Check Router settings.
- Disable VPN connections.
- Check Firewall Settings.
- Change your SSID.
- Uninstall and reinstall printer driver and software.
- Uninstall and reinstall the printer.
- Reset print spooler.
- Reset your printer.
Make sure to download the Printer manual and software to save some time.
Printer is not connecting to Wi-Fi
1] Perform Basic Check
It’s important to get few things sorted before we assume the printer has a problem. The checks include the printer being turned on, connected to the same network as your computer, having your WiFi turned on, and no other device using the printer. All these can be easily checked.
In case of a wired printer, make sure that the connections are firm.
2] Restart Printer, PC, and WiFi Router
Restarting can solve most of all the problems, and make sure you have restarted both of them and not just the printer. It may be a temporary issue that can be ironed out, such as reconnection to the network, a printer bug that was not allowing you to connect to the printer, and so on.
3] Run The Printer Troubleshooter
In Windows 11
- Go to Settings > System > Troubleshoot > Other troubleshooter
- Locate the Printer troubleshooter, and click on the Run button.

In Windows 10

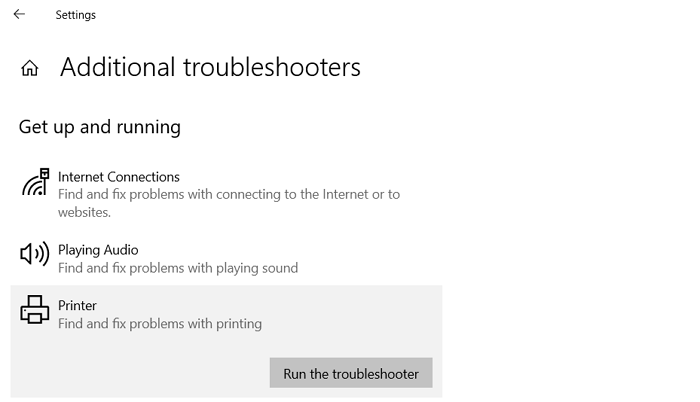
- Go to Settings > Update & Security > Troubleshoot > Additional troubleshooters
- Select Printer, and then click on Run the Troubleshooter
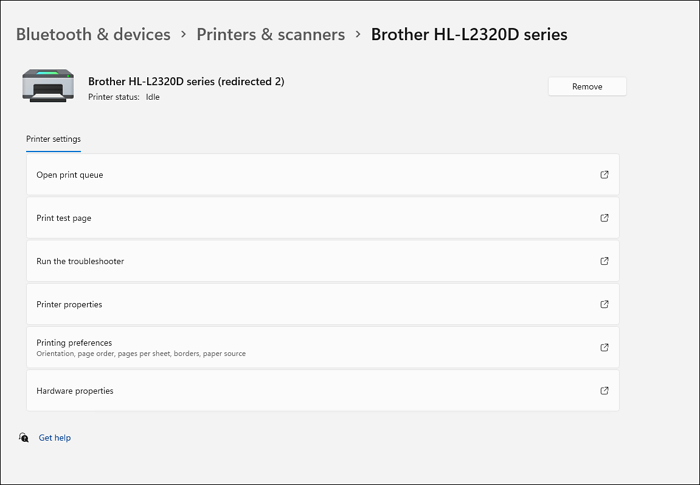
Additionally, you can go to the Printer section and choose to troubleshoot. This method is much faster, but you need to go to Bluetooth & Devices > Printer and scanners, click on the printer in question, and then click on the Run the troubleshooter link. In Windows 10, it is located under Devices.
4] Make The Printer IP Address Static
When devices are connected to the router, they are assigned an IP address. This IP address is dynamic and may change every time the printer connects to the router. While it works most of the time, this dynamic IP can become an issue. It would be best to assign a static, i.e., fixed IP, to the printer.
That said, this can only be done from the Router settings. You will need to find the printer in the connected device list and then set up a static IP. The process will differ from router to router, so make sure to check in the router manual.
Read: How to reset Printer to default factory settings.
5] Check Router Firewall Settings
Now that most of the router has an advanced configuration, you may want to check if the device has been blocked from connecting to the router. It can be the firewall setting or an accidental block.
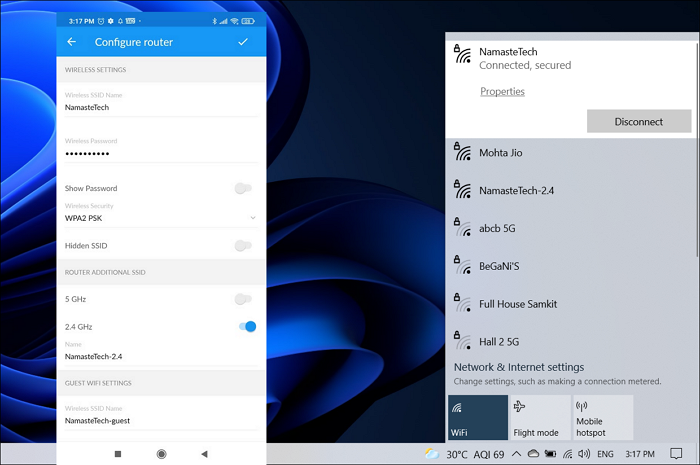
Login to the Router either through the PC or use the app from your phone. Find the device list or firewall setting and check if any device is marked as blocked. The routers can now figure out the type of device, and you may see a printer icon next to it.
Apart from this, do few small checks as well. If you have changed the router password or updated ISP settings or anything that needs devices to reconnect, remove the Wi-Fi setting in the printer and connect again.
6] WiFi Network Name

This usually happens when you are using a Desktop, have changed the name of WiFi, and your PC works fine over ethernet, but your router goes missing.
When you change the name, then you need to reconnect all the devices again as it’s a new network. Printers are usually neglected or last in the list as they are not frequently used.
That said, it is also possible that you have set up a name that is the same as another SSID, and the printer is not confused because it will not be able to authenticate. In this case, you will have to change the WiFi Network Name to something unique.
7] Disable VPN Connections
When using a VPN, the IP settings change, and the computer may not be a part of the network at all. This will result in the printer not available to the computer. The annoying part is that it might be available in the printer list, but you will not be able to use it.
If you are using VPN software, turn it off. If VPN is set up in Windows, disable it.
7] Check with Security Software
At times your security software might be restricted in excess that it will block access to the printer. You may want to check the Firewall settings and check if any of the incoming network settings are blocked, allowing you to get feedback from the printer.
In Windows, Firewall settings are with the Windows Security system. Check the Firewall notifications and Inbound and Outbound settings in the advanced firewall. Anything that is blocked should catch your attention, followed by verification if it belongs to the printer.
Be aware not to turn on anything that is blocked without understanding it. If you are using a third-party service, you may want to check the settings of that software.
8] Reinstall Printer, its Driver and Software
If the connection is fine, the last option is to reinstall the printer, the associated driver, and the OEM software that came with it.
Go to the Windows Settings Devices section, find the printer, and uninstall it. When you select it, you will see a Remove button next to the printer name.
Once done, remove any related software. Go to Settings > Apps > Apps and Features. Find the software, and then remove it.
Finally, you can now install the printer again. Since it is available on a Network, you should select a Network Printer instead of a local printer option when adding the printer. Once it is added, you can install the OEM software to install the driver and related tools.
9] Reset Print Spooler
Print Spooler service manages all printing jobs and processes. If this get gets stuck, the printer may not respond as expected. It would best to clear or reset the print spooler and start fresh.
Open Run Prompt using Win + R
Type Services, and press the Enter key to launch Services Snap-in
Locate Print spooler service, and stop it.
Minimize the window, and navigate to the following folder using the File Explorer
%WINDIR%\system32\spool\printers
%WINDIR%\system32\spool\PRINTERS
Delete all the files inside it
Open the Services window, and start the Print Spooler service
Make sure it is set to Automatic.
Related: How to connect a Wireless Printer to Windows PC.
10] Reset Your Printer
If nothing else works, it’s time to reset the printer. Most WiFi printers come with a display that can help you find the reset option in the UI or look for a hardware reset button. When used, every setting you had set up in the printer, including the Wifi connection, will be removed.
In simple words, it is also called a factory reset. If you cannot find it, check on the OEM website and locate the manual. It should have full detail on how you can reset the printer.
I hope the post was useful, and you were able to fix the issue around the wireless Printer not responding.
Be aware Not Responding can have multiple meanings. For some, it could be a printer not available on the network, while for some, it could be a genuine printer issue where the printer cannot print as expected.
Also read: Printer not working in Windows 11.