If the WLAN extensibility module has stopped working on your Windows computer, this post is sure to help. The error can be irritating as it will keep you disconnecting from the internet or, worse, won’t connect to it. Fortunately, you can follow some simple suggestions to get your wireless connection back on track.
Fix the WLAN extensibility module has stopped
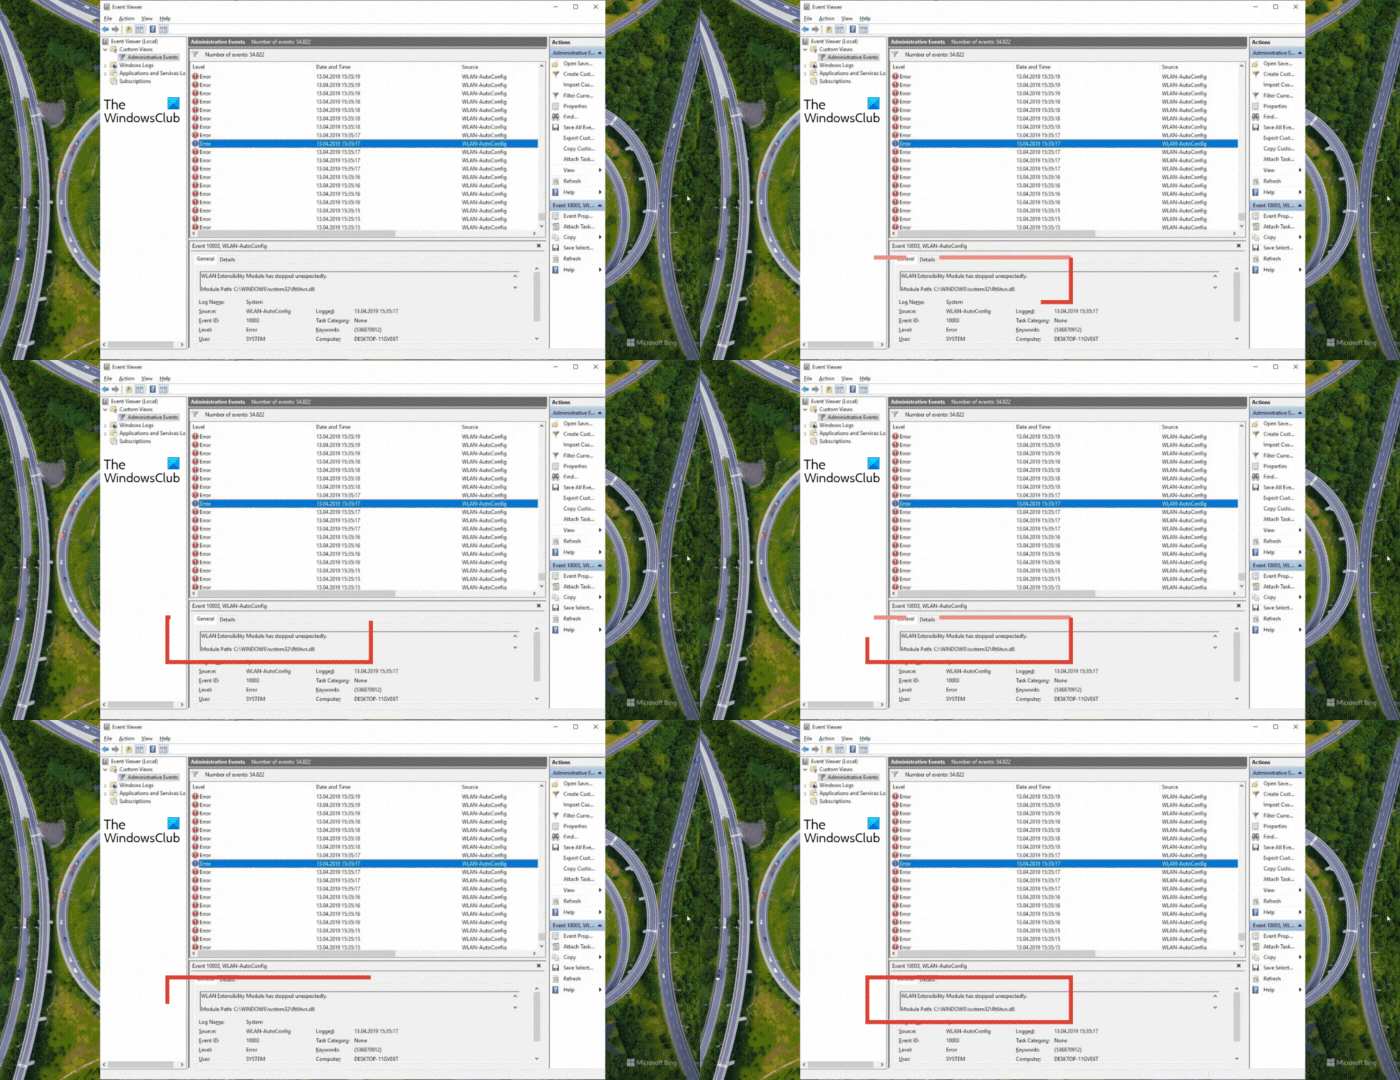
If the WLAN extensibility module has stopped working on your Windows computer, and displays Event ID 10002 in the Event Logs, follow these suggestions to fix it:
- Run Network and Internet Troubleshooter
- Disable and Re-enable the Wireless Network Connection
- Restart WLAN AutoConfig Service
- Modify Power Options
- Modify Advanced Power Settings
- Reinstall the Network Adapter Driver
- Run some Network Commands
Now, let’s see these in detail.
1] Run Network and Internet Troubleshooter
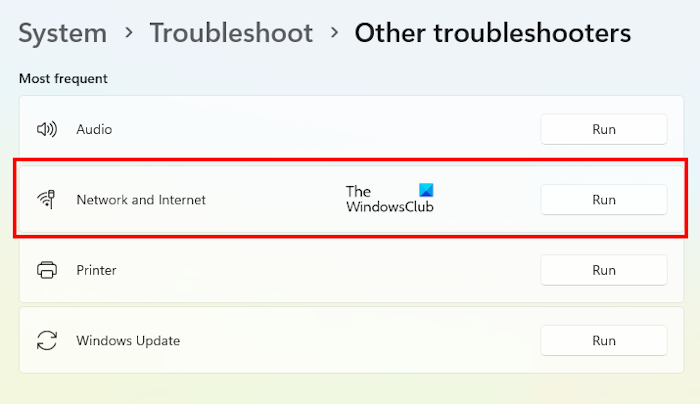
Start by running the Network and Internet Troubleshooter, which is Microsoft’s built-in utility that helps diagnose and fix network-related errors. Here’s how:
- Click on Start and select Settings, or press the Windows + I key combination simultaneously.
- Navigate to System > Troubleshoot > Other Troubleshooters and click on Run beside Network and Internet.
- The troubleshooter will now automatically search for errors and fix them.
2] Disable and Re-enable the Wireless Network Connection
If you’re connected to Wi-Fi and can’t access the internet, try disabling and re-enabling your wireless network connection. Doing so will reset network components, refresh IP configuration and clear cached network information. Here’s how you can do it:
Click on Start, search Control Panel and click Open.
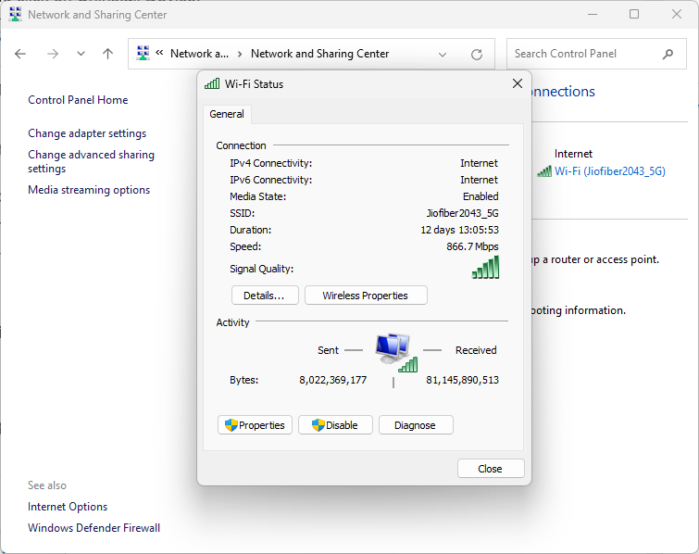
Once the Control Panel opens, navigate to Network and Internet > Network and Sharing Center and click on the Wi-Fi network you’re connected to.
The Wi-Fi Status tab will now open; click on Disable at the bottom.
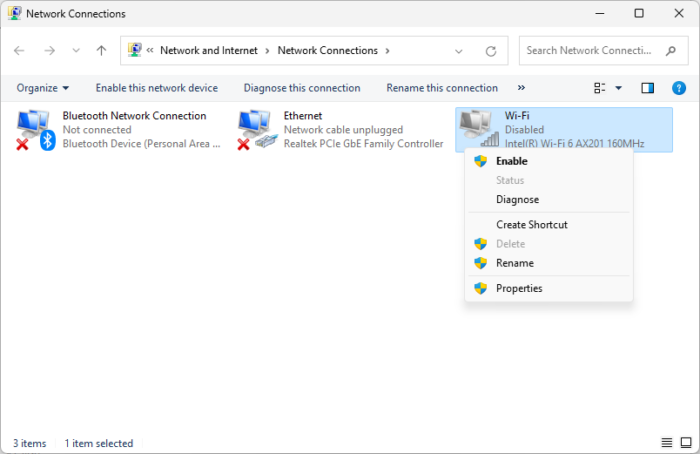
Now, click on Change adapter settings on the left, right-click on Wi-Fi and select Enable.
Connect to the Wi-Fi network and see if the WLAN extensibility module has stopped error gets fixed.
3] Restart WLAN AutoConfig Service
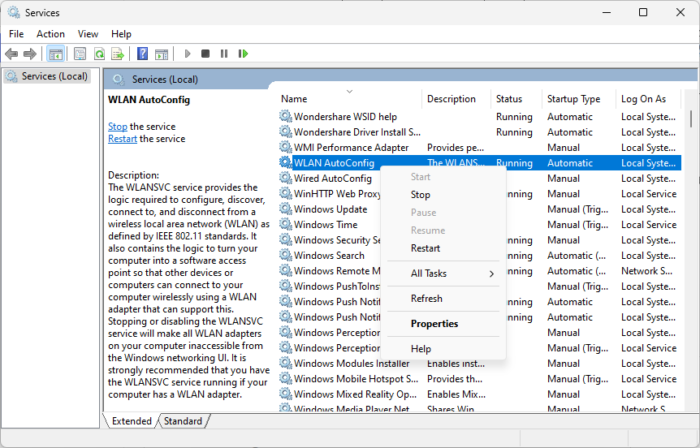
The WLAN AutoConfig service manages wireless networks your PC automatically connects to and configures wireless network adapter settings as required. Restarting this service will renew the IP address configuration and help fix the error. Here’s how:
- Click on Start, type Services and hit Enter.
- The Services window will now open; scroll down and search for the WLAN Autoconfig service.
- Right-click on the service and select Restart.
4] Modify Power Options
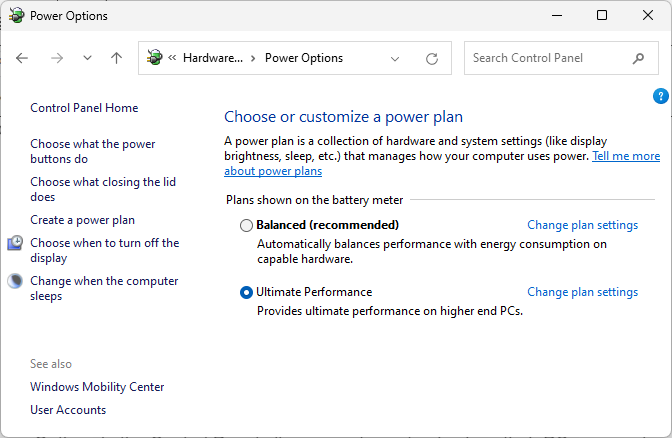
Power Options in the Control Panel allow users to customize how their PC uses and conserves power. Set Power Options to Ultimate Performance as this power plan will maximize performance without restrictions. Here’s how:
- Click on Start, search Control Panel and click Open.
- Navigate to Hardware and Sound > Power Options and set it to Ultimate Performance or High Performance (whichever your PC has).
5] Modify Wi-Fi Adapter Settings
If the WLAN extensibility module has stopped error still isn’t fixed, consider modifying the Wi-Fi Adapter Settings. Here’s how:
Click on Start, search Device Manager, and click Open.
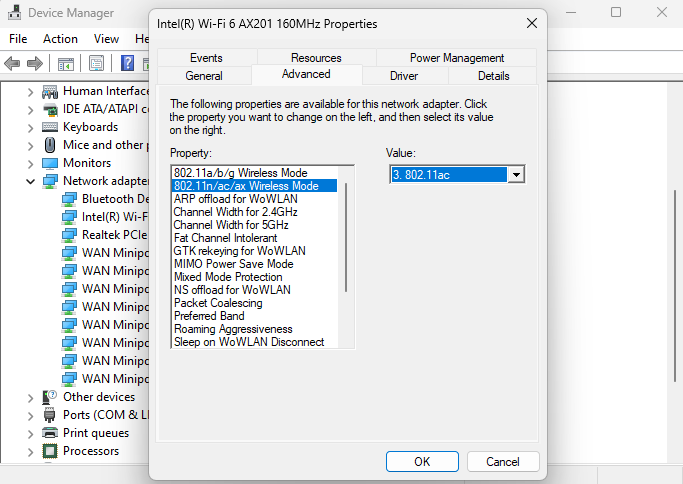
Expand the Network Adapters section, right click on your WiFi adapter and click Properties.
Once the Properties tab opens, navigate to the Advanced tab and set Property to 802.11n/ac/ax Wireless Mode and Value to 802.11ac.
Next, navigate to the Power Management tab and uncheck Allow the computer to turn off this device to save power.
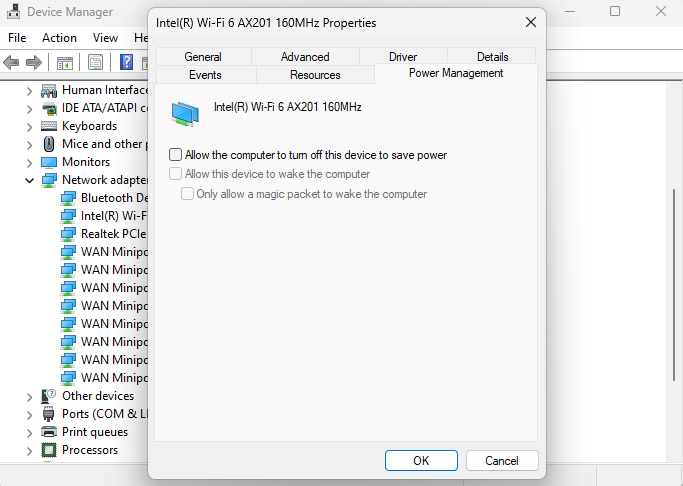
Click OK to save the changes and see if the error’s fixed. If it isn’t, set Property back to 802.11a/b/g Wireless Mode and Value to Dual Band 802.11a/b/g and follow the next suggestion.
6] Reinstall the Network Adapter Driver
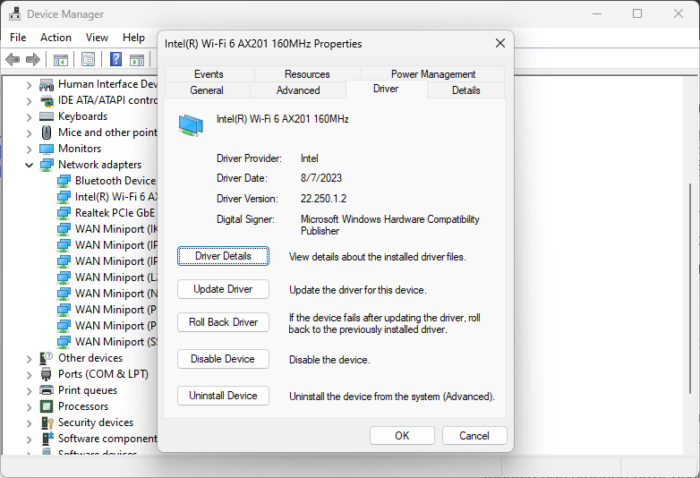
Next, uninstall the network adapter driver and restart your Windows 11 device. Once you restart your PC Windows will automatically download and install the latest version of the network adapter driver. This may be helpful if the WLAN extensibility module has stopped error occurs after updating windows.
Here’s how to uninstall Network Adapter Driver:
- Click on Start, search Device Manager, and click Open.
- Expand the Network Adapters section and double-click on your WiFi adapter.
- Navigate to the Driver tab and click on Uninstall Device.
If this doesn’t help, install the Network Adapter Driver manually.
Related: WLAN Extensibility module has failed to start
7] Run some Network Commands
Lastly, run these network commands to reset the TCP/IP stack, reset Winsock, and flush the DNS client resolver cache. Here’s how:
Open an elevated Command Prompt, type the following commands one by one and hit Enter.
netsh winsock reset
netsh int IP reset
ipconfig /release
ipconfig /renew
ipconfig /flushdns
Restart your device once done.
Read: Windows could not start the WLAN AutoConfig Service, Error 1068
How to fix Windows wireless service is not running on this computer?
If the Wireless service isn’t running on your Windows device, open Services, scroll down, and search for the WLAN Autoconfig service. Right-click on the service and click Restart. If it’s disabled, right-click and select Start.
Why isn’t my Windows connecting to Wi-Fi?
If your Windows device isn’t connecting to Wi-Fi, run the built-in Network and Internet troubleshooter and update the network adapter’s drivers. If that doesn’t help, try disabling and re-enabling your wireless network connection.
Leave a Reply