Are you experiencing a high CPU usage of Wlanext.exe on Windows? Some Windows users have reported seeing a process named Wlanext.exe with high CPU usage causing system problems. Now, what is this process, and how can you fix its high CPU usage? Let us find out in this post.
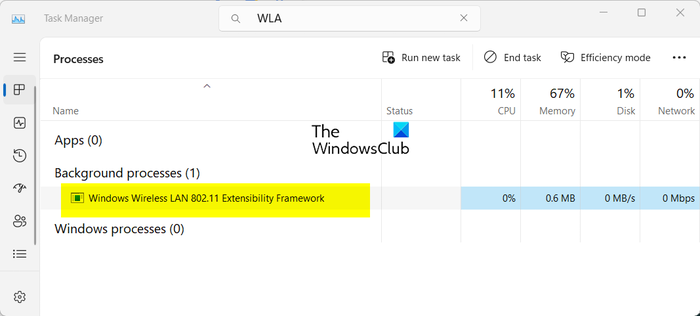
What does Windows Wireless LAN 802.11 Extensibility Framework do?
Wlanext.exe is an essential Windows component known as Windows Wireless LAN version 802.11 Extensibility Framework. It is basically an interface for wireless security and connectivity features on Windows OS. This program file is responsible for managing your wireless network connections, including managing your network settings, diagnosing wireless connectivity issues, etc.
It is a legitimate process. However, if your PC is infected, hackers can create duplicates of such processes and run them on your computer. So, you must ensure that the running Wlanext.exe process is genuine by checking its path, which is C:\Windows\System32 folder.
Now, some users have complained about facing high CPU usage of Wlanext.exe. Many have reported that it ultimately slows down the system and causes various other system performance issues.
This problem could be a result of various factors. One of the common causes is that your wireless network and other device drivers are outdated or corrupted. Apart from that, if your system contains malware, this problem might occur.
Fix Wlanext.exe high CPU usage on Windows
If you see Wlanext.exe having a high CPU usage on your PC and causing issues, you can use the following methods to fix the problem:
- Update your driver, especially wireless network drivers.
- Let the Windows built-in troubleshooter fix the issue.
- Run a virus scan.
- Roll back or reinstall your network adapter driver.
- Check if Wlanext.exe is malware.
- Disable and then enable your wireless adapter/connection.
- Troubleshoot Windows in Clean Boot State.
- Perform a system restore.
1] Update your driver, especially wireless network drivers
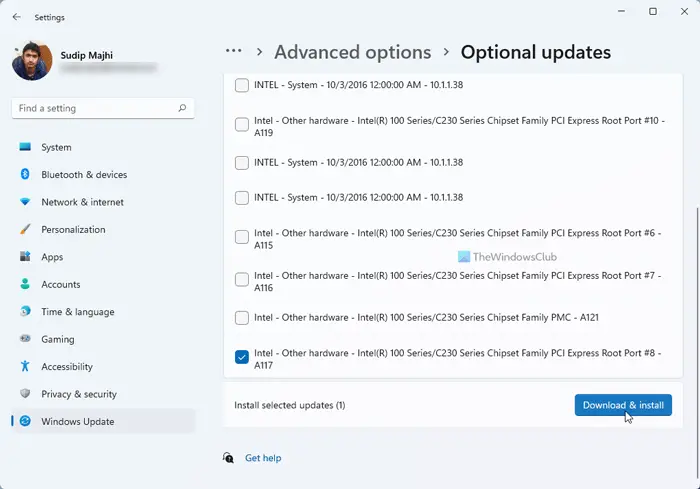
An outdated wireless network driver can lead to a high CPU usage of Wlanext.exe on Windows. Hence, if the scenario is applicable, you can update your network driver to its latest version and then see if the problem is resolved. In addition to that, outdated device drivers in general can cause services and apps to behave weirdly. So, make sure all your device drivers are up to date.
You can update the network and other device drivers via the Settings app. First, open the Setting app using Win+I and move to the Windows Update tab. Now, click on the Advanced options > Optional updates option and check if there are pending device driver updates. If so, select all driver updates and click on the Download & install button to start downloading the updates. You can complete the installation by restarting your PC. Once done, check if the high CPU usage of Wlanext.exe is resolved or not.
Read: Cryptographic Services high Disk or CPU usage.
2] Let the Windows built-in troubleshooter fix the issue

Before you try advanced fixes, we recommend you use Windows built-in troubleshooter that quite effectively fixes the problems. Run the Network Adapter troubleshooter and see if the problem is fixed. Here’s how you can do that:
- First, launch the Settings app using Win+I.
- Now, go to the System > Troubleshoot section.
- Next, tap on the Other troubleshooters button and click on the Run button present next to the Network Adapter troubleshooter.
- Let the troubleshooter scan for related issues.
- Once done, apply a recommended troubleshooting method to fix the issue.
Check if the CPU usage of Wlanext.exe is reduced or not.
3] Run a virus scan
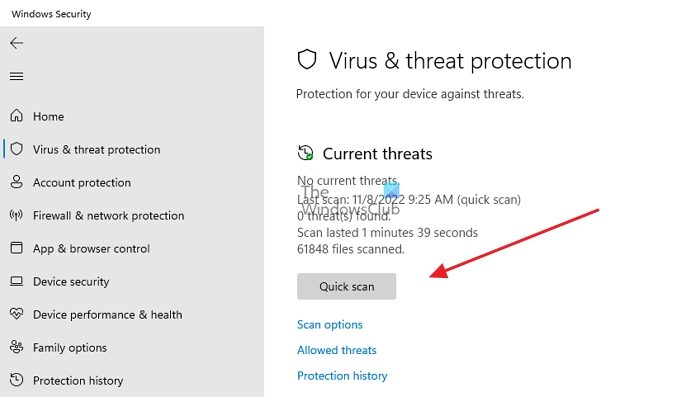
If your computer is infected with a virus or malware, you will likely experience this issue. Hence, if the scenario is applicable, run a virus scan using the Windows Security app or the installed antivirus and remove detected threats from your PC. Then, restart your computer and see if the issue is resolved.
4] Roll back or reinstall your network adapter driver
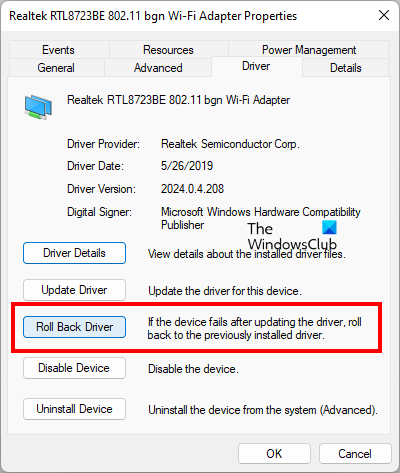
If you started experiencing this issue right after installing a new update for your network driver, it might be the case that the update didn’t go well and is causing the problem. Hence, in that case, you can roll back our network driver to a previous version and see if that helps. Here’s how:
- First, open Device Manager using the Win+X menu.
- Now, expand the Network Adapters section and right-click on your driver.
- Next, choose the Properties option from the appeared context menu.
- After that, go to the Driver tab and press the Roll Back Driver button.
- When done, check if the issue is resolved.
If the issue remains, try uninstalling and reinstalling your network driver to fix the problem.
See: Windows Error Reporting WerFault.exe high CPU, Disk usage.
5] Check if Wlanext.exe is malware
If you see two instances of the Wlanext.exe process, one instance is malware. You can analyze the process and then remove it from your PC. Here is the step-by-step procedure to do that:
First, open Task Manager using Ctrl+Shift+Esc and see if two Wlanext.exe processes are running on your computer. If so, right-click on the process and press the Go to details option. Now, you will see details including the Image path name. If you don’t see it, right-click on the top of a column and choose the Select columns option, and tick the Image path name column.
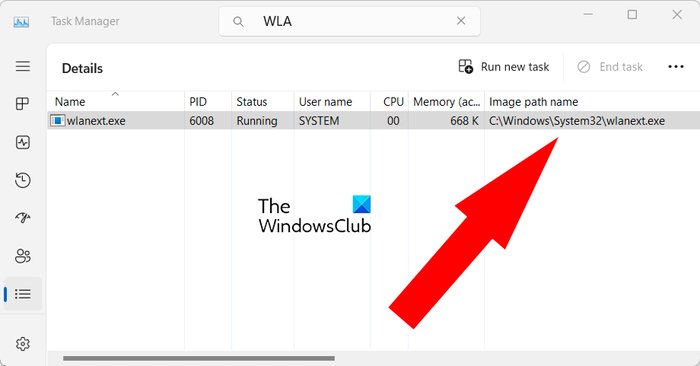
Next, see if the path of the Wlanext.exe process is C:\Windows\System32 or not.
If the location is somewhere else like C:/Windows/wmu3/, the program is malicious. You will then have to remove it from your computer.
For that, copy the location of the malicious Wlanext.exe process and close it using the End task button. After that, move to the copied location and delete the Wlannext.exe file.
Finally, restart your computer and the problem will be resolved now.
Read: Service Host SysMain causing High CPU and Memory usage.
6] Disable and then enable your wireless adapter/connection
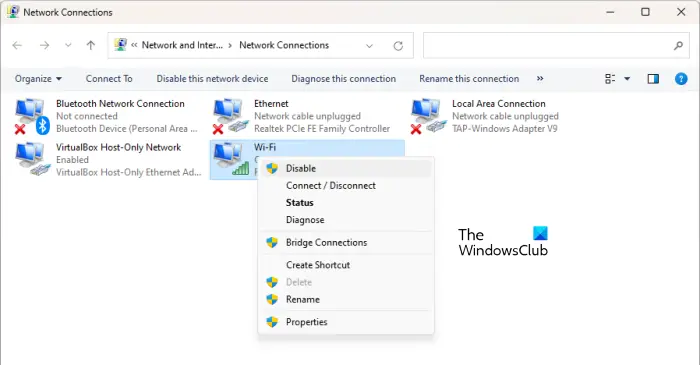
You can also try disabling and then re-enabling your wireless adapter or wireless connection to fix the issue. To disable and then enable your wireless adapter, follow the below steps:
- First, open the Device Manager app, expand Network Adapters, and right-click on your network adapter device.
- Now, choose the Disable device option from the context menu.
- Next, again right-click on the device and press the Enable device option.
- See if the problem is resolved now.
If the issue persists, you can also temporarily disable your wireless connection using the below steps:
- First, open Settings using Win+I and move to Network & internet > Advanced network settings > More network adapter options.
- Now, in the appeared window, right-click on your wireless connection and choose the Disable option.
- Next, wait for some time and then again press the right click on your active wireless connection.
- After that, click on the Enable option from the context menu.
See: WMI Provider Host (WmiPrvSE.exe) High CPU Usage in Windows.
7] Troubleshoot Windows in Clean Boot State
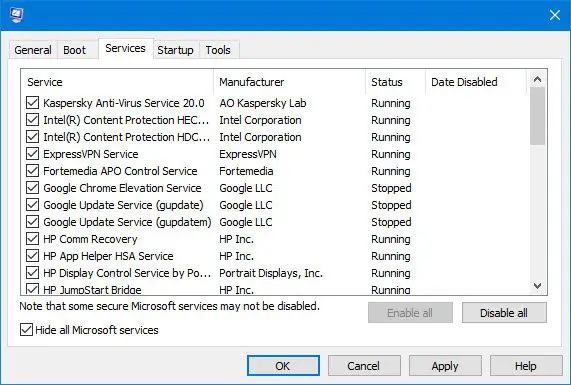
As reported by some users, booting Windows into Clean Boot has helped them fix the issue. The issue could very well be facilitated due to a software conflict.
So, you can perform a Clean Boot and see if the problem is resolved. If yes, then you must manually identify the offender and eliminate the process.
Read: Fix Search Indexer High Disk or CPU usage in Windows.
8] Perform a system restore
If the Wlanext.exe started consuming high CPU usage after a modification made to your PC, like installing a program, you could revert to a previous and healthy version of your PC to fix the issue.
To do that, you can use a System Restore point. Hopefully, you won’t face the same issue now.
Why is Wsappx using so much CPU?
WSAPPX is a process associated with Microsoft Store that includes AppX Deployment Service (AppXSVC) and Client License Service (ClipSVC). Its high CPU usage generally occurs when downloading and installing an app on Microsoft Store. If your computer is having a malicious program, this issue can happen. Apart from that, software conflicts can also cause the same problem. So, you can close Microsoft Store, perform a virus scan, or perform a clean boot to fix the issue.
Now read: Fix 100% Disk, High CPU, Memory or Power usage in Windows.