Printing a Word document with background colors and images is not always necessary, but there may be instances where we need to do so for special events. In this post, we will show you how to create a custom background or change the background color of your Word document. Additionally, we will also discuss how to add drop caps in Word.
Change Word Document Background Color
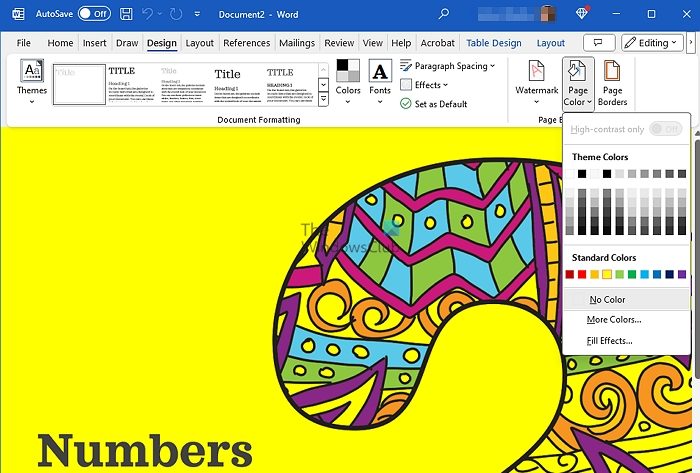
- Click on the Design tab of your current Word document.
- Then click on Page Color and select the color you want.

Observe the background of your current Word document is transformed to the color of your choice.
If you plan to print it, you must configure a few settings. This will ensure that Microsoft Word sends the background color to the printer.

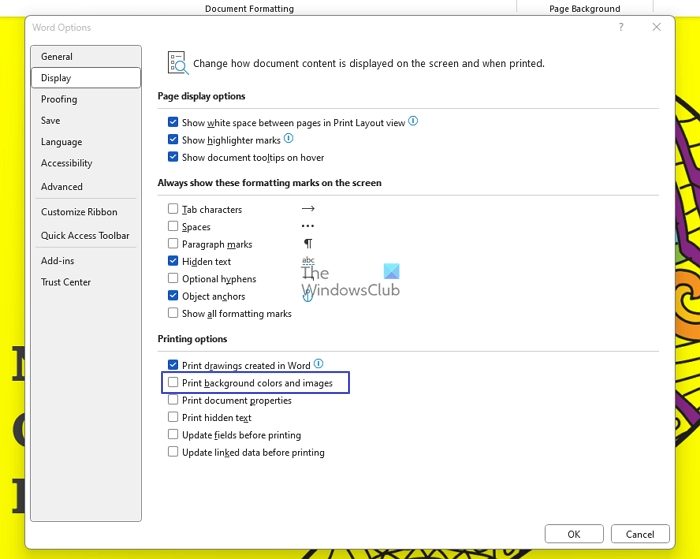
- Click on File > Options > Select Display
- Check the box next to Print background colors and images.
- Click on the OK button to save the changes.
Add Drop Caps in Word
A drop cap (dropped capital) is a decorative capital letter at the start of a paragraph or section. It makes the start attractive and has been used even in newspapers. Here is how to add it:
- Open any Word document
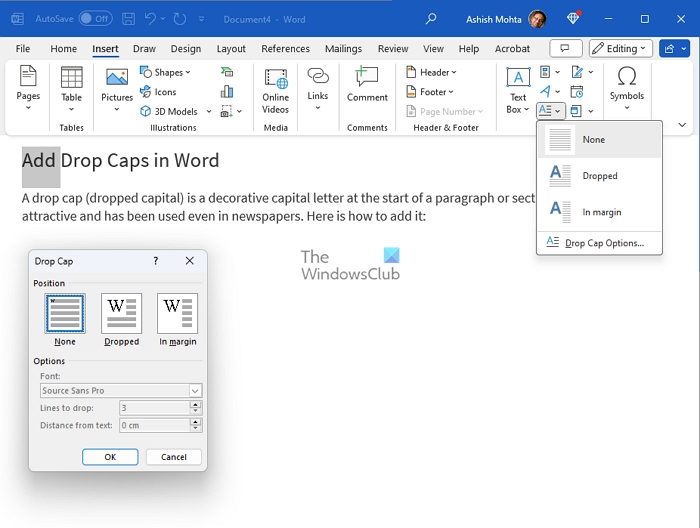
- Select the first alphabet of the sentence of the paragraph.
- Go to Insert tab
- Locate the Text section and click the icon, which is the alphabet A with lines on the right.
- Next, from the available designs, choose the one you would like to apply to your Word document.

If required, adjust the size of the drop cap using its side corners. If you would like to drop the idea of adding a Drop Cap, you can do so by selecting ‘None’ from the Drop Cap options.
I hope the post was easy to understand.
What are the two types of Drop Cap in MS Word?
Read: How to create a Drop Cap in Google Docs
Why is the Drop Cap unavailable in Word?
To use the Drop Cap menu, you need to select the existing text first. If you have any space selected, the option to use Drop Cap will be greyed out in your menu. To select the text, you can simply click and drag the cursor over the text you want to apply the Drop Cap to.
Good tips,
Thanks,
Eugineprakash