Microsoft Word bears some amazing image editing feats that can light some creative fires. Of course, it can’t beat giants like Photoshop, but if someone isn’t inclined much to spend a hefty amount and climb the steep learning curve, I advise switching to Microsoft Word for basic image editing. Today, we see how to use Microsoft Word picture editing tools to correct and improve your pictures.
Microsoft Word Picture editing Tools
To edit an image, you need to open it first. For that, open Microsoft Word on your computer and switch to the Insert tab. Here you can find an option called Pictures. Click on it and select the This Device or Online Pictures option.
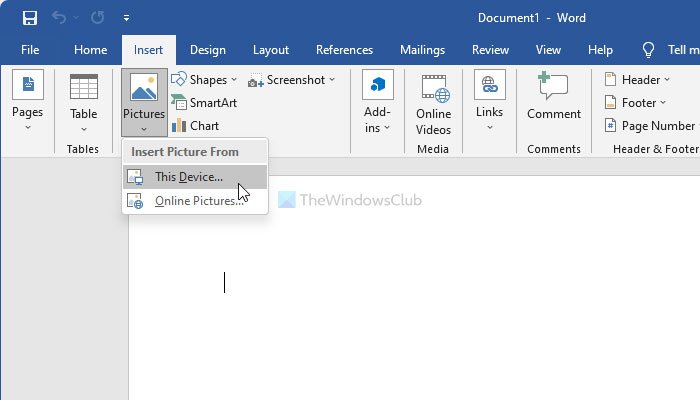
If you select the former option, you can open an image from your computer, whereas the latter option lets you fetch an image from an online source.
Once the image is opened in Word, you can find a new tab named Picture Format.
You need to find all the following options in this tab.
Remove Background
As the name suggests, the option will let you selectively remove portions of a picture based on color patterns. In other words, you can remove the background of your image using Word.
For that, click the Remove Background option and select the portion you want to remove.
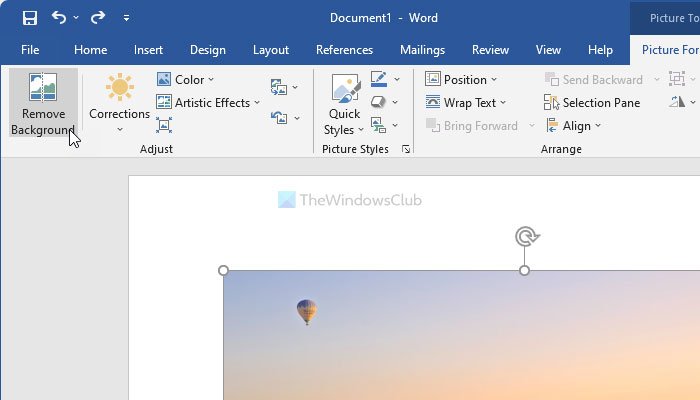
Next, click the Keep Changes button.
Corrections
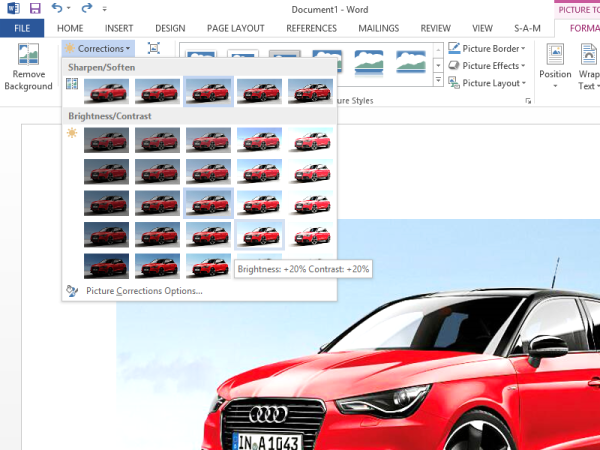
Adjacent to the ‘Remove Background’ option you can find ‘Corrections’. Hit the drop-down and select the option that suits your picture best. You can sharpen, soften, and adjust the brightness of the image for better on-screen presentation.
Color
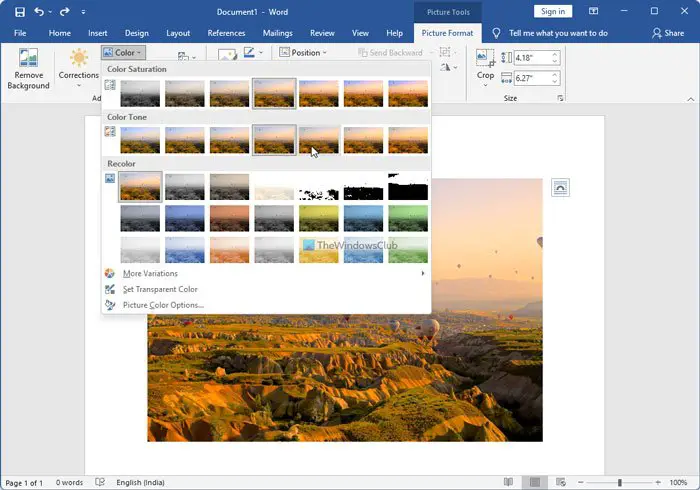
You can apply different color effects to make your image/picture look more compelling. Options available are sepia tone, grayscale, and many more. For that, you need to expand the Color option and choose an effect you want to apply.
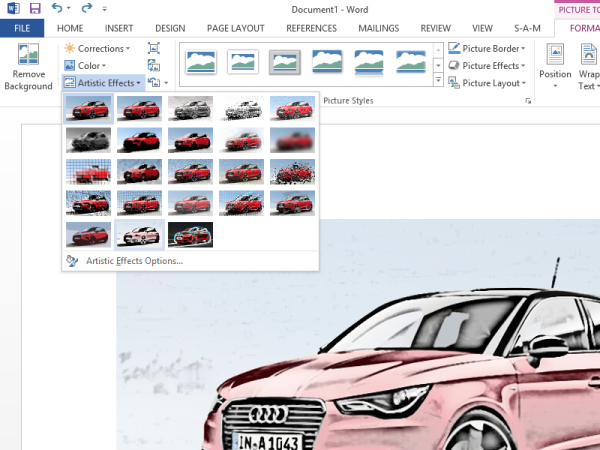
Artistic Effects
The command located in the ‘Adjust’ group provides 23 special effects, such as pencil sketch, blurring, charcoal sketch, paint strokes, and others making the picture appear to have been made from various mediums.
Compress Pictures
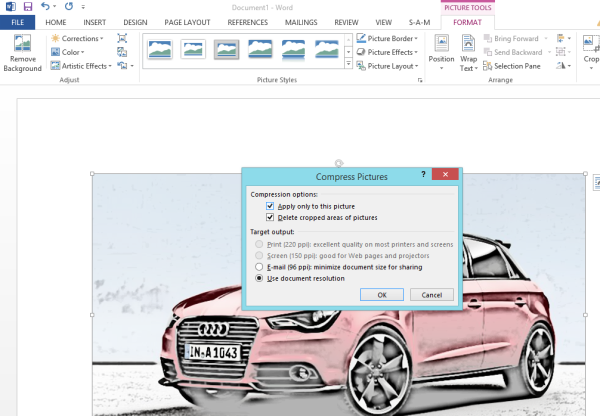
Users can manually resize images or pictures in the Word document using the Compress feature. When you press the option a dialog box appears displaying the following Compression options:
- Apply only to this picture: Select whether you want to compress or modify selected pictures or all the pictures in the document.
- Delete cropped areas of pictures: Removes the areas of images that you have cropped out. Cropped areas once removed cannot be retrieved.
Reset Picture
Click this button to set the image color, brightness, contrast back and other adjust tools.
Picture Border/Effects/Layout
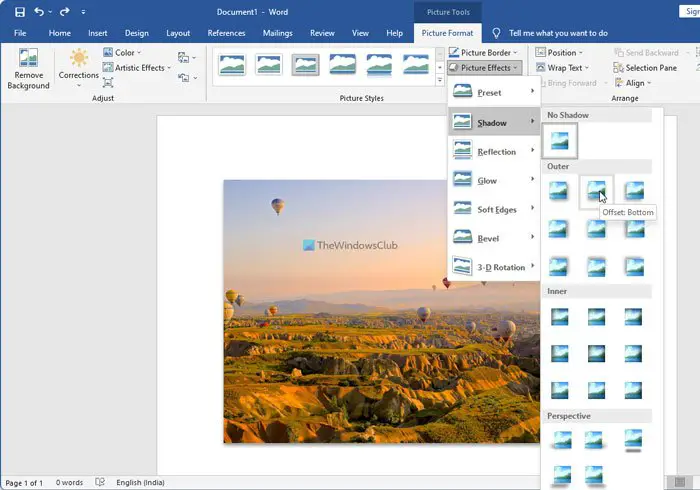
Picture Border, Picture Effects, and Picture Layout – these three options let you customize your picture in a different way. Other than the Artistic Effects, you can use the Picture Effects option to set an effect to your picture’s border. On the other hand, the first option helps you set border color, and the third option allows you to convert your image into a shape.
Crop

It is possible to crop an image in Word. The best part about this cropping tool is that you can crop the image and turn it into a shape, or by aspect ratio, etc. For that, click on the Crop option and select the type as per your requirements.
How can I edit a picture in Word?
Editing a picture in Word is not that tough as long as you understand the basic options. To edit a picture in Word, you need to follow the entire article so that you can open and add various effects as per your desire. Most of the essential options are included in the latest version of Word, and you can use them on your Windows 11/10/8/7 computer.
How do I freely edit a picture in Word?
Word doesn’t hold you from using any option included in it. In other words, you can insert an image and start using any given option whenever needed. For your information, you can remove background, correct colors, add image effects, change position, crop image, etc., with the help of Word.
Were you already using them or was this new for you?
Talking of Word 2013 and Picture Editing, One should definitely check out this Videos!
http://www.youtube.com/watch?v=RZp7BvQJnU8
kk
r u afk?
Hello in Picture Manager there was an amazing function where you could select multiple images, say send to word and then you can choose the size before inserting them so it then compresses them all and they are the same size. Where is this now that picture manager is no longer there?
I didnt have any idea that word 2013 has the feature of removing background any image. Wow now I need to check that out also!
It was a fantastic idea. I did not have any idea of this word documentary. Obviously I will try this. Thanks for your amazing idea.