If Word is not displaying images correctly on your Windows device, then this post may help. Microsoft Word is a plain text editor that lets you create professional-quality documents. You can also add images in Word files to make them more intriguing. But recently, some users have complained that Word is not displaying images correctly. Fortunately, you can follow some simple suggestions to fix it.
Why is my Word document not showing images?
Images may not show in Word documents if the file is corrupted or not supported by the Office version installed on your PC. However, there are several other reasons it may occur. Some of them are:
- Image insertion errors
- Unsupported or corrupted image format
- Compatibility Mode
- Third-Party Add-Ins
- Image wrapping and positioning errors
Fix Word not displaying images correctly
If Microsoft Word does not display the images correctly, restart Word and check for any pending updates. Other than that, follow these suggestions:
- Use In line with text style
- Check Document Compatibility
- Enable Show drawings and text boxes on screen option
- Enable Print drawings created in Word
- Disable Use draft quality and Show field codes instead of their values
- Launch Microsoft Word Safe Mode
- Repair Microsoft Office
Now let’s see these in detail.
1] Use In line with text style
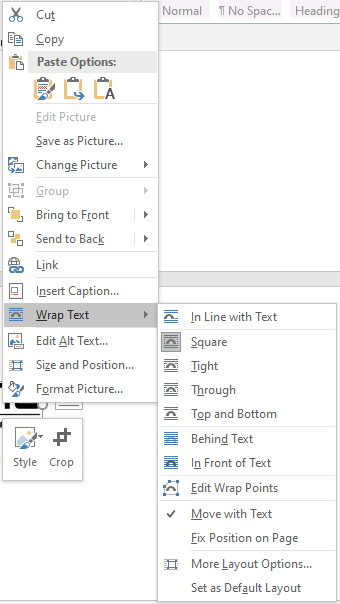
The In line with text option places an image on the line as surrounding text. Enabling this feature will help fix Word not displaying images correctly issue. Here’s how:
- Click on the image, navigate to the Format tab and select Text Wrapping in Arrange group.
- Click on In line with text, and the image or object will be displayed.
2] Check Document Compatibility
Start by checking if the document you’re using is compatible with the version of Word installed on your device. It’s possible the document isn’t supported or is corrupted.
3] Enable Show drawings and text boxes on screen option
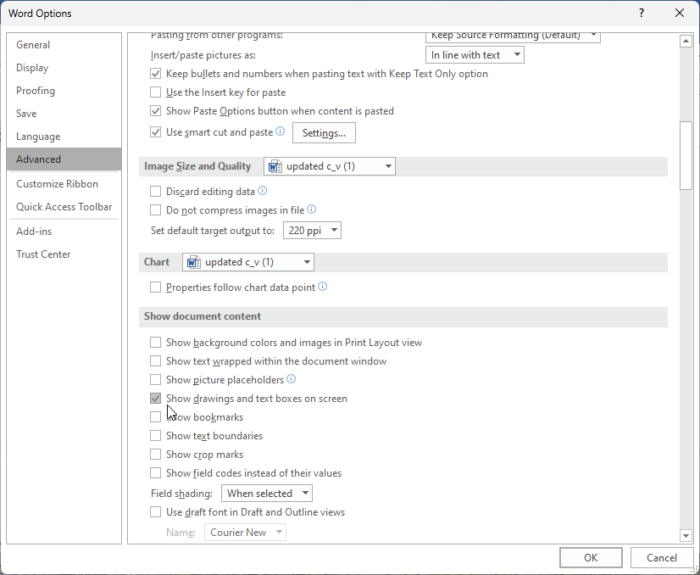
Enabling the Show drawings and text boxes on the screen will allow viewing the picture in Print Layout or Web Layout views. Here’s how you can do it:
- Click on File, click on Options, and select Advanced.
- Under Show document content, select Show drawings and text boxes on screen option.
- Lastly, click on Ok to save the changes.
4] Enable Print drawings created in Word
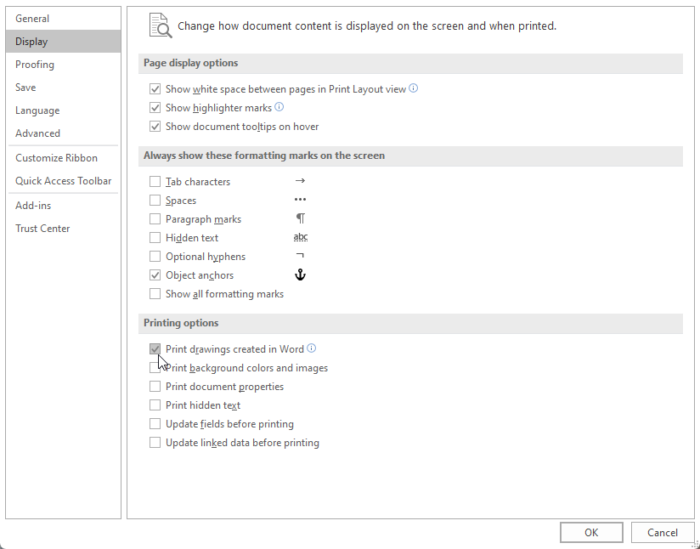
The Print drawings created option allows viewing the picture or object in Print Preview. It’ll then allow you to print the image. Here’s how:
- Click on File, click Options, and select Display.
- Select Print drawings created in the Word option under Printing options.
- Click on Ok to save the changes.
5] Disable Use draft quality and Show field codes instead of their values
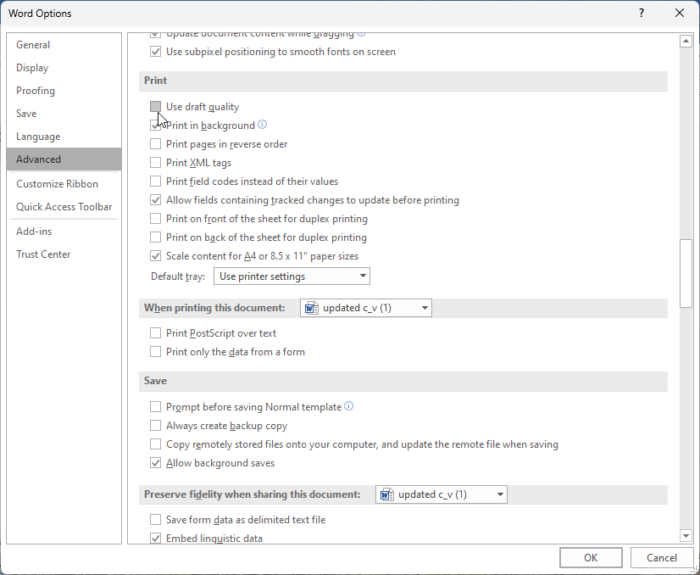
Disabling Use draft quality and Show field codes instead of their values options will increase the quality of the draft and display more information about it. Here’s how you can do it:
- Click on File, click Options, and select Advanced.
- Under Print, uncheck the Use draft quality option.
- Next, clear the Show field codes instead of their values option under Show document content.
- Click on Ok to save the changes.
6] Launch Microsoft Word Safe Mode
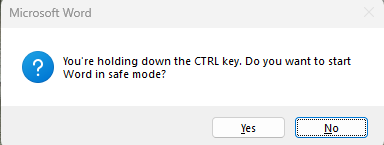
Default settings and installed drivers can also be why Word displays images incorrectly. Running Word safely will start the application with limited files and drivers. Here is how you can do it:
- Press and hold CTRL, then double-click on the Word file.
- A prompt will now ask, “Do you want to start Word in Safe mode?”; click Yes.
- Word will now open in Safe Mode. Check if the images are shown correctly.
7] Repair Microsoft Office
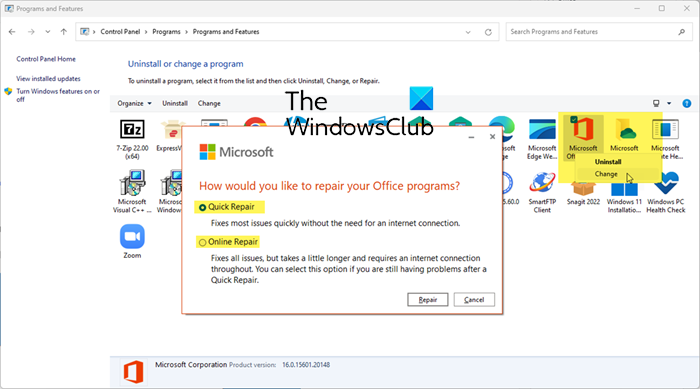
If none of these suggestions mentioned above could help, repair the Word application. Here’s how:
- Press Windows Key + I to open Settings and navigate to Apps > Apps & Features.
- Click on the Office product you want to repair here and select Modify.
- Click Online Repair and follow the instructions on-screen.
Read: Read Aloud isn’t available because something is preventing it from starting in Word
How do I align images perfectly in Word?
To align images in Word, click the Home tab and navigate to the paragraph option. Here, select among the align options to align the image.
Why do images in Word lose quality?
Images uploaded in Microsoft Word lose quality because the images are compressed and resized. This degrades the image from its original quality. You can prevent this by manually adjusting the image settings or using different editing software.
Leave a Reply