Probably the most awaited Windows desktop app for bloggers, WordPress for Windows PC, is available. WordPress.com is a popular platform to make a website or a blog. Whether you want to work on a tech niche, fashion niche, or anything else, you can easily opt for WordPress CMS, which is the best and most easy-to-use CMS.
Although the WordPress app has been available for mobile platforms, yet, the desktop editions are still under development. However, now you can use WordPress for Windows PCs without any special system requirements.
Although this app is named WordPress for Windows, you cannot use a self-hosted WordPress blog with this app. It only supports wordpress.com blogs. Therefore, if you have a wordpress.com blog, you can utilize this app on your Windows machine. This is a drawback of this app. At the same time, this is a great update for wordpress.com users. Nevertheless, if you are using the Jetpack plugin, you can use this app partially because Jetpack has an option that lets users use their self-hosted WordPress blog and wordpress.com site from the wordpress.com dashboard. Anyway, that is a different thing in this case.
UI of WordPress for Windows
The user interface of the WordPress app for Windows is very neat and clean. Although it comes with a couple of options, all of them are well organized. It has the traditional blue and white color combination. The overall design of the WordPress app is pretty good and confusing.
WordPress desktop app for Windows PC
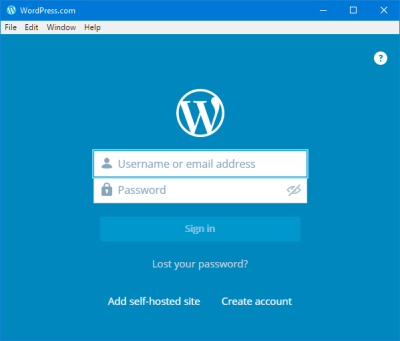
As mentioned before, there is no such strict system requirement – at least, nothing is mentioned on the official website. Therefore, it is possible to install this app on almost all the latest Windows versions, including Windows 11/10. First, install the WordPress desktop app on your Windows PC. After opening it, you will get a window like this,
Here, you can enter your wordpress.com site credential. If you have such a site, you can enter the login details. Otherwise, if you want to create a wordpress.com website, you can create that by clicking on Create account button. This is very easy and not very time-consuming.
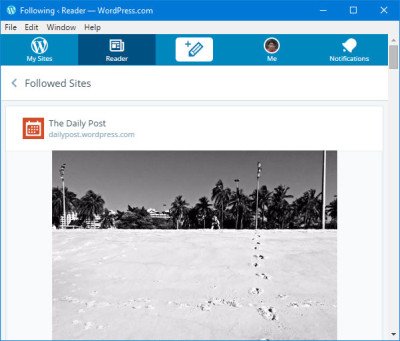
After logging in, the following window will appear:
It will show you your followed websites or the Reader window where you can read different posts by different wordpress.com blog owners.
WordPress for Windows has almost all the options users generally get on the web version. Therefore, let’s check out all the options of the WordPress app for Windows.
Profile Management
This is where you should get started because the security of your blog and professional profile are both required. You can set up both of them from the Profile Management section of this app. On the other hand, it is very easy to open the profile settings. Just click on your profile picture from the main navigation. Here, you can do the following things.
My Profile:
- Upload/change profile picture
- Enter/change your name
- Enter/change display name – this is what other people will see in the author bio
- Edit author bio
- Add additional site link
Account Settings:
- Change username
- Edit email address
- Primary site selection – if you have multiple sites in one account, you can change the primary site. If you set Site A as the primary site, you will get all the things related to that whenever you will sign in
- Change web address of your site
- Change interface language
- Enable/disable Fun Mode
Security:
- Change password
- Enable/disable two-step authentication – this is recommended for any account including this one
- Manage connected app – you can mainly find WordPress.com Desktop app in the list. Don’t disconnect this app. Otherwise, you will have to log in again
Notifications:
- Manage notifications for comment, update and reader subscriptions.
Now, if you want to customize your site with beautiful free themes, you may need to check out these steps.
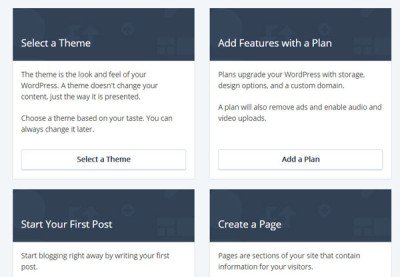
You know that WordPress allows users to change the default theme anytime. To change the theme of your wordpress.com website using the WordPress app for Windows, head over to the Next Steps button under Profile Management section. Although there are other methods to change the theme, but this is quicker. After clicking on the Next Steps button, you can find another option called Select a Theme.
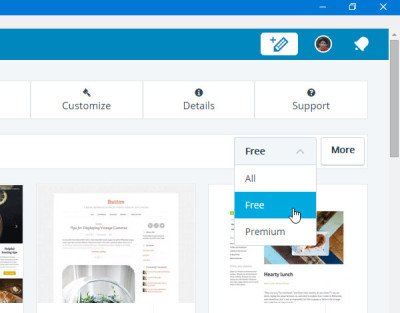
Here, you can find a lot of free and paid themes. You can filter that using a button that looks like this,
After that, choose a theme and activate it. To activate any theme, click on the three dotted button and select activate. You can also check the preview from the same menu.
After enabling a theme, if you want to customize that, just hit the Customize button that is positioned on the same page.
If you are having any problems while loading the customizer, don’t panic. You are not alone. Many other users are getting the same problem with this app.
However, if you can open the theme customizer, you can add various widgets and do other stuff from the same window.
Set up Menu
Menu bar or navigation bar is an important element of any webpage that helps users to find out different things faster. For example, you are writing on Windows OS, and you have added some categories in the post. Or you have added some pages like About Us, Contact, etc. Now, if you want to add a menu bar to your website, you need to follow this guide.
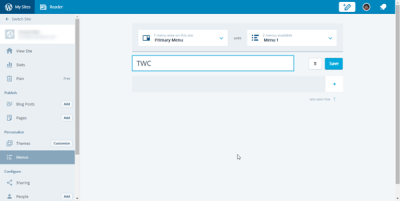
On the left-hand side, you can find an option called Menus. Just click on this. Now, depending on the theme, you can find the Primary menu, Secondary menu, footer menu etc. Now, click on Default Menu button and create a new menu bar with your desired name.
Therefore, add items (page, category, custom link) and save the menu. Following that, select a menu location by clicking on the menu location button. It will be set automatically. You do not have to do anything else.
Write the first post
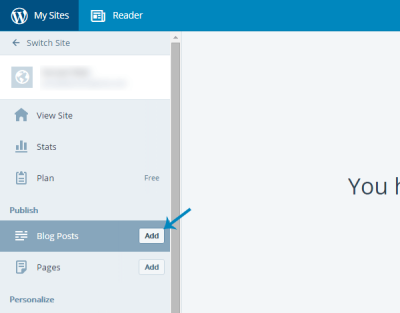
Now, as everything is almost ready, it’s time to write your first post or write another post. To write a post, you can find an Add button next to the Blog Posts options.
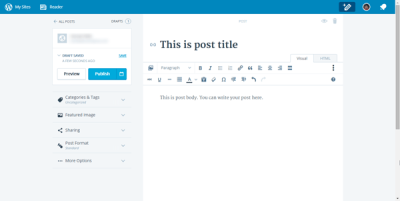
Click on that to write your posts. Here you can find a window like this,
You can add a title, post body, category, tag, featured image, post format, slug, excerpt, location and many more. It is also possible to allow or block comments, pingbacks and trackbacks from the same window.
Like a regular writing panel, you can switch to HTML from Visual interface. If you want to schedule any post, just click on the calendar button that is placed next to the Publish button. Therefore, you can set a time and date.
The most important part of any website is statistics. You can record visitor statistics using in-built or third-party services like Google Analytics, StatCounter etc. Here you can find the in-built tracking system, and the big thing is you do not have to include any code to start tracking. Just head over to the Stats tab to check your visitor statistics.
How to quit WordPress app in Windows
It works something like the desktop version of the Skype app. That means if you sign out and click on the close button of the WordPress app window, it will be minimized as it shows notifications. Therefore, if you want to quit this app, click on File and select Quit.
Drawbacks in WordPress for Windows
Although Automattic has launched the WordPress app for Windows to make things easier, it has some tiny flaws. Here are some of them,
- Theme customizer doesn’t work properly. Many users have got problems while customizing the theme.
- Scrolling is not so smooth. Sometimes, you can get the scrolling but the scroll bar remains in the same position.
- You cannot add more people to your blog from this app. You will have to open the web version to get things done.
- Last but not the least, this app is not compatible with self-hosted WordPress blog.
Considering everything, this is quite good for WordPress.com users since they always have to use the web interface to run their blog. After Windows Live Writer, the official app will make their work faster.
If you like, you can download WordPress for Windows from wordpress.com.
