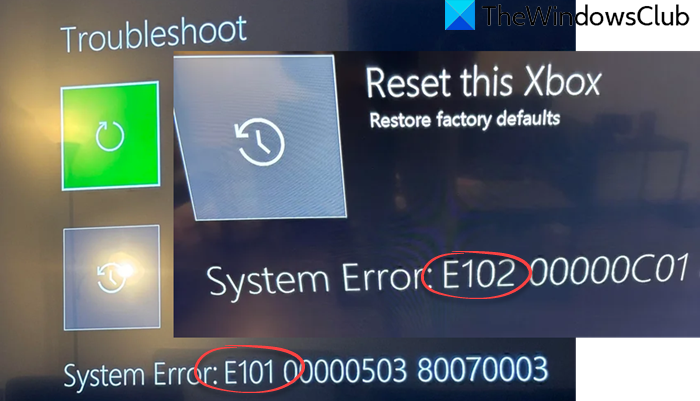
The Xbox One is certainly a great impressive video game console developed by Microsoft. It took years to develop this game into a trusted gaming brand. But in recent days, several Xbox users reported a periodic Startup System Error E101 or E102 that prevents them from using their console.

This error mainly appears when the system starts or when users try to install the OS update. But there’s not much a user can do to deal with this problem. Fortunately for those who have encountered System Error E101 or E102, there are a few things you can try to fix it. So, read this article to continue.
Fix Xbox One System Error E101 or E102
To fix System Error E101 or E102 on Xbox One, follow the below suggestions:
- Reset your console to factory defaults
- Update your Xbox One offline.

Let’s now see them in details:

1] Reset your console to factory defaults
To reset your console, turn off your console first and then unplug the power cable.
Wait for a while (around 30 seconds) and then plug the power cable back in.
Now start your console again.
To do so, press and hold Bind & Eject button, and at the same time tap the Xbox Button.
You will find the Bind button on the left side of your console. This button is used to pair the new Xbox one controller. And, the Eject button available on the front of the console.
Now continue holding the Bind and Eject button for around 10-15 seconds, you will hear power-up tones two times.
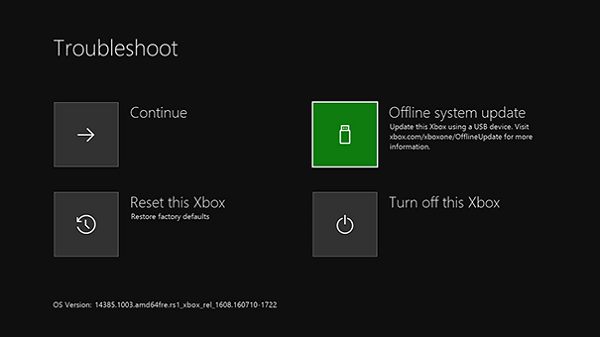
Release both the Bind and Eject buttons after you hear the second power-up tone. This will launch the Xbox Startup Troubleshooter directly.
Once you are inside there, select Reset this Xbox and then press A on your controller to confirm it.
When the confirmation window pop-up, select Remove Everything.
This will start removing every single data including installed applications and games.
Read: How to fix Xbox One startup errors or E error codes.
2] Update your Xbox One offline
To update Xbox One offline, you will need a computer with an internet connection and a USB with a capacity of 4 GB free space to complete the process. Also, make sure the USB is formatted as NTFS.
Let us now see the details in details but before that, you should have a backup of the important data saved on the USB drive. Otherwise, you will get lost your data after formatting the drive.
Now plug the USB flash drive into the USB port on your PC.
Then download the Offline System Update (OSU1) file that available as a ZIP file.
Once the file gets downloaded, right-click on the zip file and choose Extract All. It will extract the contents of the archive to a folder of your choice.
Make delete all the files from the USB drive. Then copy the $SystemUpdate file to the root directory of the USB flash drive. Also, ensure there are no other files apart from this in the flash drive.
Now turn the console off and unplug the power cord. After a minute plug the power cord back in. Press and hold the Bind button and Eject button then press the Xbox button on the console.
Continue pressing and holding the Bind and Eject button for 10-15 seconds. When you hear a power-up tone, release both buttons. From there you will be taken to a troubleshooter menu where you can update the Xbox One locally using the USB flash drive.
Now plug the flash drive in the console and then select Offline System Update. After that, select the source of the update, and then update.
Once the update gets installed, remove the USB flash drive from the USB port of your console.
Leave a Reply