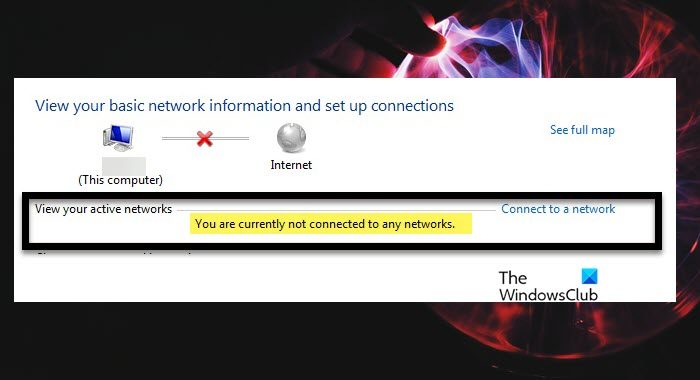
Some users have complained that Windows shows “Not Connected” in Quick Access > WiFi and they just don’t know what to do about it. When they opened Network and Sharing Center to do further investigation, the WiFi says that it is connected but after some time, it displays the following error message – You are currently not connected to any networks. In this post, we are going to talk about this error and see what you can do to fix it.

Fix You are currently not connected to any networks error in Windows 11/10
If you encounter You are currently not connected to any network error in Windows, the very first thing you should do is restart your router. This removes any network glitches that may have been causing the issue. If that’s to no avail, execute the solutions mentioned below to resolve the error in question.
- Restart Network Adapter
- Perform a Network Reset
- Use Google DNS
- Run Network Troubleshooter
- Uninstall and Reinstall WiFi Network Adapter Driver
Let’s discuss these solutions one by one to resolve the said error.
1] Restart Network Adapter

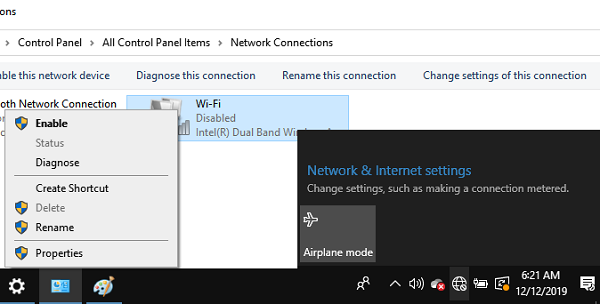
We can resolve this type of issue by disabling and enabling the WiFi adapter from Control Panel. It has been seen that by doing this the problem goes away if it is a result of a temporary glitch. When you disable the WiFi Adapter, every other device in the room will be able to detect the WiFi network but your computer can’t. It will only be able to connect or even detect the WiFi network once you enable the WiFi Adapter. This will allow the WiFi Adapter to resolve its internal issue and flush out the glitches to start working just fine. So let’s resolve this issue by using the following steps.
- Press Windows + R key to open the run dialog box.
- Type ncpa.cpl and press Enter button to open the Network Connections window.
- Once it opens right-click on the WiFi adapter and select Disable.
- Right-click on the Wifi adapter again and select Enable and check if the issue is resolved.
After restarting the WiFi Adapter, check your network and see if the issue is resolved.
2] Perform a Network Reset

If you are unable to access anything from the Internet due to the said error, reset your wifi adapter setting as it reverts everything to its factory settings. So, if the issue is a result of misconfiguration, resetting the network will resolve your issue. Follow the prescribed steps to do the same.
- Press Windows + R key to open the run dialog box.
- Type ms-settings:network in the run dialog box and press enter to open the Network & Internet option.
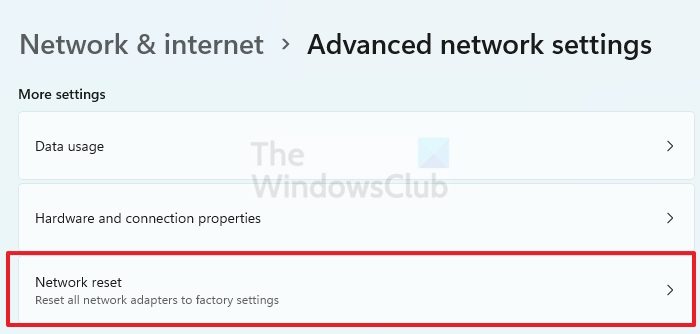
- On the bottom of the screen click on Advanced network settings. In the More settings section, click on Network reset.
- Once it opens click on the Reset now button and select Yes.
Now restart your PC and try to connect to your WiFi network and check if the issue is fixed.
3] Use Google DNS
Next up, in order to resolve any network issue, you can use Google Public DNS. The DNS provided by your ISP may not be reliable or is facing some issues. In that case, you should set up Google Public DNS on your Windows computer to not only resolve this issue but also safeguard yourself from upcoming network issues.
4] Run Network Troubleshooter

Microsoft offers a built-in Network Troubleshooter that comes with a set of troubleshooting tools to assist you in automatically identifying and resolving the issues. Here, we are using the Network troubleshooter tool to diagnose the said error. Follow the prescribed steps to do the same.
Windows 11
- Press Windows key and click on Settings.
- Click on System, scroll down, and click on Troubleshooter.
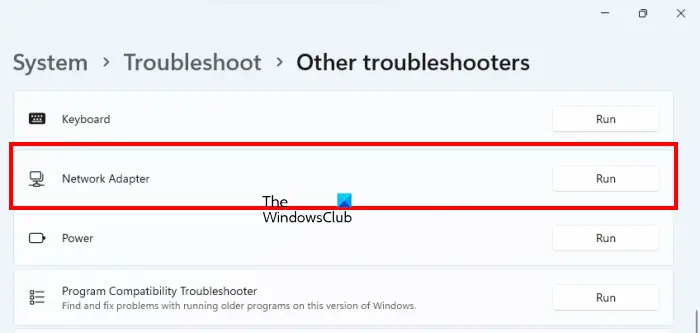
- Click Other troubleshooters and find the Network Adapter and click the Run button next to it.
- Once you click on the Run button the network adapter troubleshooter will run immediately to find and fix the issue related to WiFi.
Windows 10
- Open Settings.
- Go to Update & Security > Troubleshooter > Additional troubleshooters.
- Select Network Adapter and then click on Run the troubleshooter.
After this process gets completed, now you access anything from the internet without any issues.
6] Uninstall and Reinstall WiFi Network Adapter Driver
If your Network Adapter is corrupted you will most likely face this error. In such cases, users must uninstall and reinstall the WiFi driver to resolve this issue. But keep in mind before uninstalling the Wifi adapter download your driver software from the manufacturer web site.
Follow the prescribed steps mention below to uninstall and reinstall the WiFi Network Adapter driver:
- Press Windows + X key to open the Quick Link menu.
- Click on the Device Manager feature.
- Expand the Network adapters option and right-click on Wireless driver and click on Uninstall device option.
- After reinstalling Network Adapters, right-click on it and select Scan for hardware changes. Most likely, your network driver will get installed, but if the installation fails, run the installation package of the driver you downloaded earlier.
Hopefully, your issue will be resolved.
Also Read: How to fix WiFi problems in Windows.
Leave a Reply