PC users on occasions may encounter one or more Remote Desktop connection issues & errors on Windows 11 or Windows 10 computer. This post provides the most suitable solutions to the various instances of the Your computer can’t connect to the remote computer error on Windows 11/10.

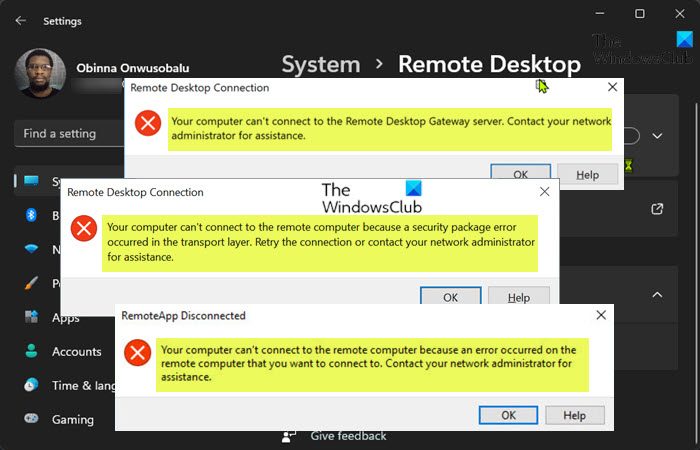
When this error occurs on your device, you may receive any of the following full error message;
- Your computer can’t connect to the remote computer because a security package error occurred in the transport layer. Retry the connection or contact your network administrator for assistance.
- Your computer can’t connect to the Remote Desktop Gateway Server. Contact your network administrator for assistance.
- Your computer can’t connect to the remote computer because an error occurred on the remote computer that you want to connect to. Contact your network administrator for assistance.
These errors occur mainly due to saved network credentials, network-level authentication in use and in some cases missing or disabled registry key.
Your computer can’t connect to the remote computer error
If you’re getting the Your computer can’t connect to the remote computer error on your Windows 11/10 computer, you can try our recommended solutions below and see if that helps to resolve the issue on your system.
- Clear credentials in Credential Manager
- Disable Remote Desktop Connection with Network Level Authentication
- Add/Enable RDGClientTransport registry key
Let’s take a look at the description of the process involved concerning each of the listed solutions.
1] Clear credentials in Credential Manager

Investigations revealed that in some cases, this Your computer can’t connect to the remote computer error actually has to do with saved authentication details for the remote desktop gateway under the connect from anywhere section in Advanced tab of the RDP client.
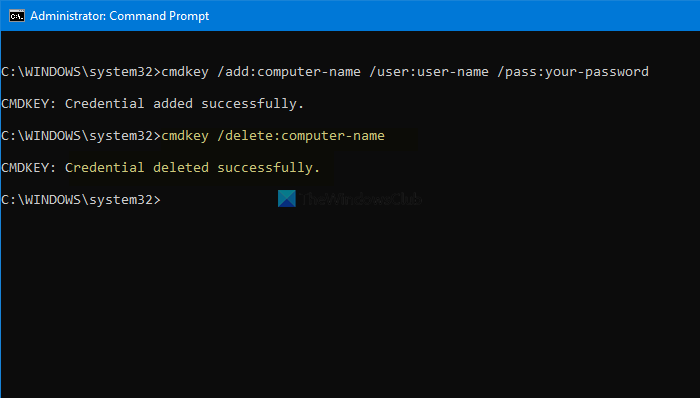
This solution requires you to clear credentials in Credential Manager. Once done, you should be able to re-establish connection on the remote computer without issues.
2] Disable Remote Desktop Connection with Network Level Authentication

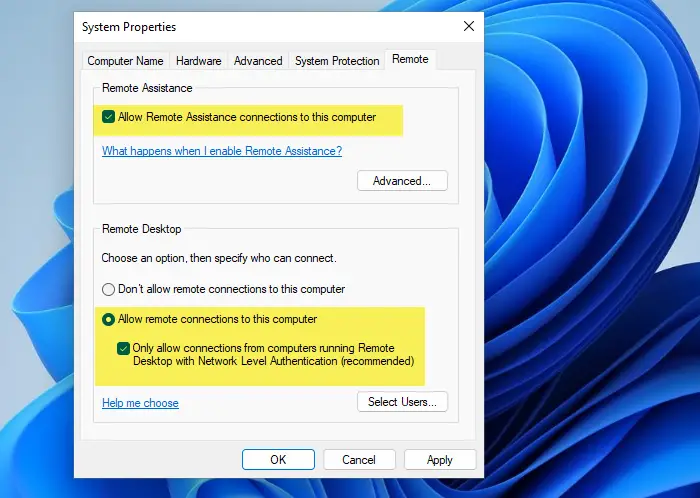
This solution requires you to uncheck the Only allow connections from computers running Remote Desktop with Network Level Authentication (recommended) option on the destination computer. To perform this task, see the guide on how to Enable, Disable, Block, Use Remote Desktop Connection in Windows.
Read: Your computer could not connect to another console session
3] Add/Enable RDGClientTransport registry key

The RDGClientTransport registry key sets which Remote Desktop transport to use. In Windows 11/10 it could be either:
- HTTP
- UDP
- RPC over HTTP (fallback)
The Remote Desktop Protocol v8 introduced the HTTP & UDP transports. The values for the RDGClientTransport registry key are;
- 0 (default – HTTP) (also known at “negotiate NLA using TLS”)
- 1 RPC over HTTP (also known as “RDP Security”)
- 2 RemoteDesktopGateway (WinHTTP)
Normally, RDP clients use RDG-HTTP transport, but they could use RDG-RPC in some cases. If the RDGClientTransport registry key is present and has a value of 1, it enforces RDG-RPC transport. Since this is a registry operation, it is recommended that you back up the registry or create a system restore point as necessary precautionary measures. Once done, you can proceed as follows:
- Press Windows key + R to invoke the Run dialog.
- In the Run dialog box, type regedit and hit Enter to open Registry Editor.
- Navigate or jump to the registry key path below:
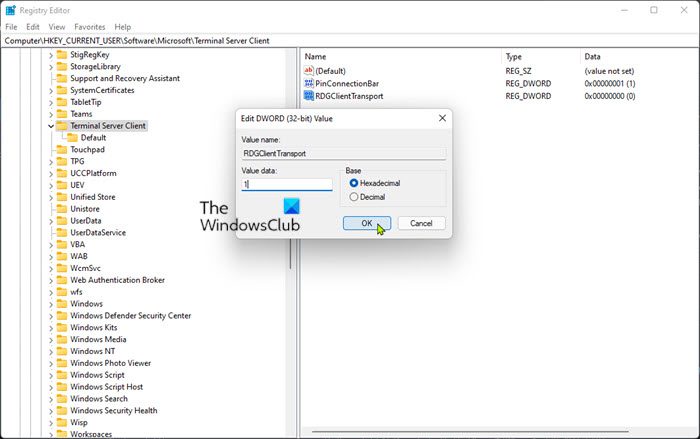
HKEY_CURRENT_USER\Software\Microsoft\Terminal Server Client
- At the location, right-click on the blank area on the right pane and then select New > DWORD (32-bit) Value to create a registry key and then rename the key as RDGClientTransport and hit Enter.
- Double-click on the new entry to edit its properties.
- Input 1 in the Value data field.
- Click OK or hit Enter to save the change.
- Exit Registry Editor.
- Restart your PC.
Alternatively, you can automatically add/enable the RDGClientTransport key in the registry. Here’s how:
- Press Windows key + R to invoke the Run dialog.
- In the Run dialog box, type notepad and hit Enter to open Notepad.
- Copy and paste the code below into the text editor.
[HKEY_CURRENT_USER\Software\Microsoft\Terminal Server Client]"RDGClientTransport"=dword:00000001
- Now, click the File option from the menu and select Save As button.
- Choose a location (preferably desktop) where you want to save the file.
- Enter a name with .reg extension (eg; EnableRDGCT.reg).
- Choose All Files from the Save as type drop-down list.
- Double-click the saved .reg file to merge it.
- If prompted, click on Run > Yes (UAC) > Yes > OK to approve the merge.
- You can now delete the .reg file if you like.
- Restart PC.
Similarly, you can achieve the same outcome adding and enabling the RDGClientTransport registry key by editing the registry via Command Prompt. Here’s how:
- Press Windows key + R to invoke the Run dialog.
- In the Run dialog box, type cmd and then press CTRL + SHIFT + ENTER to open Command Prompt in admin/elevated mode.
- In the command prompt window, copy and paste the command below and hit Enter:
reg.exe Add "HKCU\Software\Microsoft\Terminal Server Client" /V "RDGClientTransport" /T REG_DWORD /D "1"
- Exit CMD prompt once the command executes.
That’s it!
Related post: Remote desktop can’t connect to the remote computer
Why Remote Desktop can’t connect to the remote computer?
Remote Desktop can’t connect to the remote computer for one of these reasons:
- Remote access to the server is not enabled.
- The remote computer is turned off.
- The remote computer is not available on the network.
Read: A connection to remote computer could not be established
How do I restart a computer through Remote Desktop?
To restart a computer through Remote Desktop, you can run a command line with optional switches to shut down the computer:
- To shut down, enter: shutdown
- To reboot, enter: shutdown –r
- To log off, enter: shutdown –l
Happy computing!
Leave a Reply