There are reported cases making the rounds on PC support forums of some users after successfully upgrading to Windows 11, when they try to run an exe file downloaded from the internet or install an app they get a warning prompt stating Your Internet security settings prevented one or more files from being opened. This post is intended to help you resolve this issue.
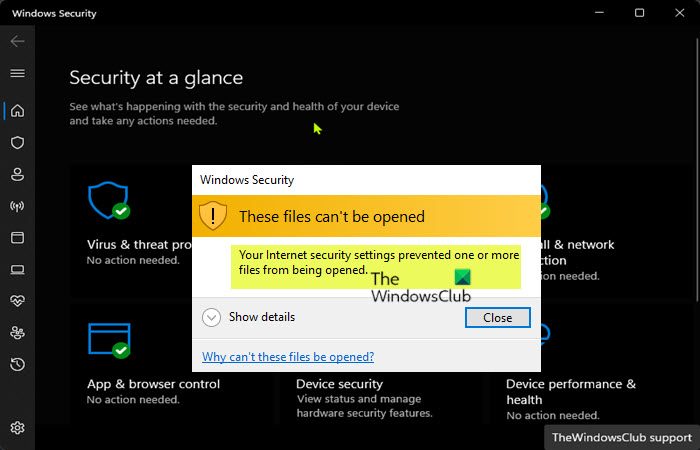
These files can’t be opened
Your Internet security settings prevented one or more files from being opened.
This issue is likely to occur if the executable files do not have a valid certificate, or somehow the wrong installation path was created; the built-in security will block the .exe file or app from opening for the security of the Windows 11 system.
Your Internet security settings prevented one or more files from being opened in Windows 11
If you’re getting the Your Internet security settings prevented one or more files from being opened on your recently upgraded Windows 11 device, you can try our recommended easy and quick fixes below in no particular order to successfully resolve the issue on your system.
- Reset Internet Options
- Check Windows Security SmartScreen settings
- Check Internet Zone settings
- Reset Windows Security Settings to default values
Let’s take a look at the description of the process involved concerning each of the listed solutions.
1] Reset Internet Options
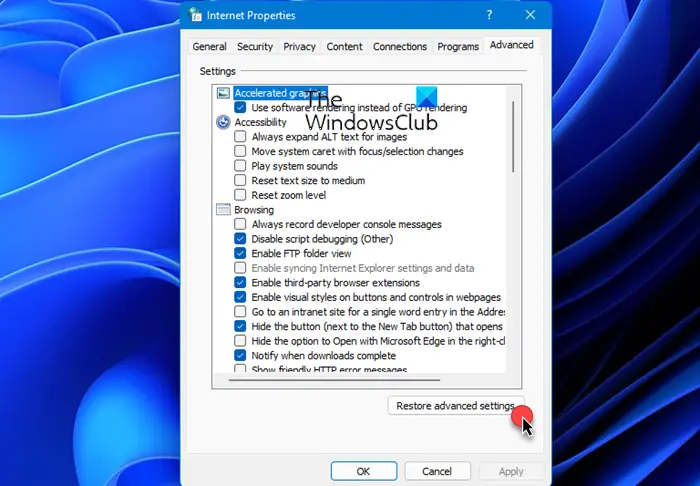
After the upgrade from Windows 10 to Windows 11, it’s likely some changes were made to your internet settings. Since you might not know specifically what changed that might be triggering the Your Internet security settings prevented one or more files from being opened error, consequently preventing you from installing apps (third-party apps especially); to resolve the issue in hand, you can simply reset Internet Options on your device.
Try the next fix if this action wasn’t helpful.
You may have to reset Edge to default settings if nothing else works for you as outlined in this post.
2] Check Windows Security SmartScreen settings
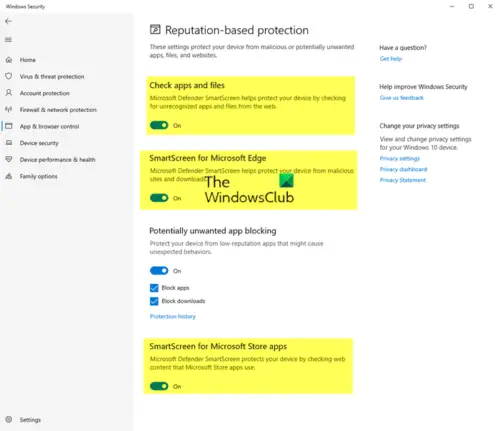
To further improve the security and privacy of your system, by default, some built-in security tools and features are enabled in Windows 11. However, you can manually disable or enable these security and privacy settings per your requirement to enhance your PC’s security.
This fix requires you to turn off Check apps and files and SmartScreen for Microsoft Edge in Windows Security, then run the file or try installing the app and see if the error in focus reoccurs.
In addition, if an app has been flagged by Windows Security as clearly shown on the error prompt, you can manually allow the blocked file or app provided you trust the source of the file/app.
And since we are dealing with the security issue, you may also temporarily disable Windows Firewall and see if that helps.
Read: How to reset Windows Security to default.
3] Check Internet Zone settings
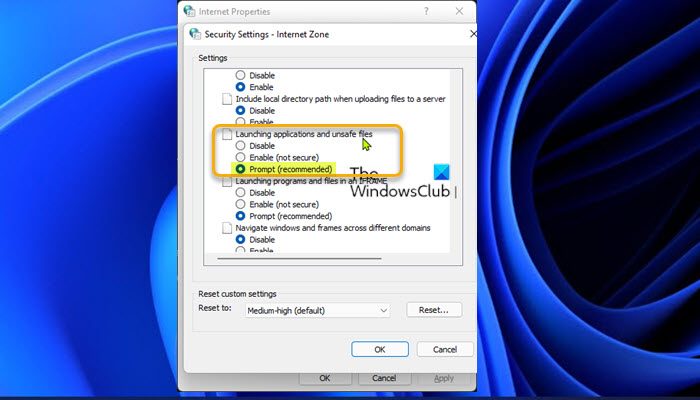
Investigations revealed the root cause for the issue you’re currently facing has to do with the Launching applications and unsafe file security setting in Internet Properties not set to the recommended setting; possibly got changed after the upgrade to Windows 11. In this case, to resolve the issue, you need to reset this setting to its default configuration. Do the following:
- Press Windows key + R to invoke the Run dialog.
- In the Run dialog box type inetcpl.cpl and hit Enter to open Internet Properties.
- in Internet Properties sheet, switch to Security tab.
- Click on the Custom level button.
- In the Security Settings – Internet Zone panel that opens, scroll down to the Miscellaneous section.
- Now, set the radio button for the Launching applications and unsafe files setting to Prompt (recommended) option.
- Click OK.
- Click Apply to save changes.
- Finally, click OK to exit Internet Properties.
4] Reset Windows Security Settings
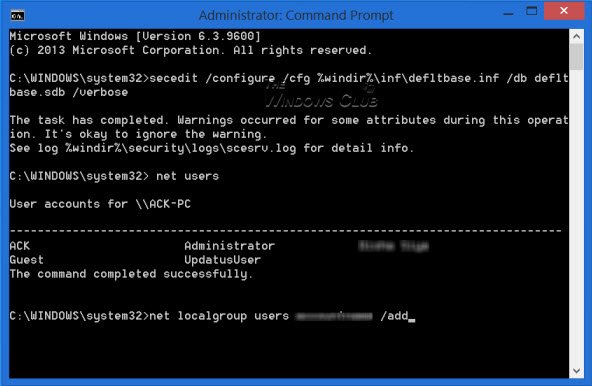
You may reset Windows Security Settings to default values and see if that helps.
That’s it!
Related post: Windows has blocked access to this file; Unblock a File on Windows
How do I change Internet security settings in Windows 11?
Open Internet Explorer, select the Tools button, and then select Internet options. Select the Security tab and customize your security zone settings in these ways: To change settings for any security zone, select the zone icon, and then move the slider to the security level that you want.
Where are security zone settings located?
Enter Internet Options in the search box, and then tap or click Settings. In the search results, tap or click Internet Options. Tap or click the Security tab, choose a security zone (Local intranet or Restricted sites), and then tap or click Sites.
How do I add a Trusted Site in Windows 11?
Trusted Sites specifies the Uniform Resource Locator (URL) for Internet sites whose content can be trusted by administrators and users. In other words, a trusted ssite is a website that you trust not to compromise your computer. To add a Trusted Site in Windows , do the following:
- Open Internet Options.
- Go to Security > Trusted sites.
- Click Sites button.
- Enter the website URL in the list and click the Add button.
What is the Internet zone?
The Internet zone is a catchall zone for sites on the Internet that another zone doesn’t already classify. By default, every site you visit that doesn’t have membership in another zone inherits the security permissions that the Internet zone defines. The Local intranet zone represents all sites in your LAN environment.