In our busy schedule, we all need a helping hand that can assist us in different situations. To help you with your online works, there are few automation tools such as IFTTT, Microsoft Flow, etc. Now, here is yet another automation tool called Zapier that works quite similar to those automation services as mentioned above. In other words, you need to select an action and make a trigger that will be triggered at a particular time. The number of available Zapier apps is high enough to fulfill your demands. It is possible to create your Zap (Applets in IFTTT). Here is everything you need to know about Zapier, the automation tool for the busy person.
Zapier review
The workflow of Zapier is nearly the same as that of other automation tools. However, the interface, the steps to create a filter or Zap, etc., are quite different.
Free version limitations: Before getting into them, you should know that Zapier is not an entirely free tool. Obviously, you can use the free version for as long time as you want, but there are some premium options as well. The free version lets you build one-to-one connections with your apps and automate basic tasks. It allows users to process only 100 tasks per month and that too in every 15 minutes. In other words, if one Zap has run at 10 am, you cannot use another Zap within next 15 minutes. From 10:16 am, it would be working fine again.
If you are fine with this, you may want to start with this tool. To start working with this automation tool, head over to the official website, and create an account. You can then look for several ready-made Zaps or Zapier Apps on the screen. You have two options. First, you can utilize those pre-made Zaps, or you can create your own, which will be more reliable and customizable.
Available apps in Zapier
There are loads of apps, and online services are available to synchronize with Zapier. It is possible to link any of the two apps. For your information, you can find Google Sheets, Gmail, Google Calendar, MailChimp, Evernote, Slack, Twitter, Facebook, Google Drive, Dropbox, Asana, WordPress, Google Contacts, Hubspot, and more. There are tons of other apps available with the free account.
How to create a Zap in Zapier
It is very easy to create a Zap in Zapier. Although the steps to trigger the Zap is quite different, the process of setting up a Zap is quite similar to other tools. The main part is you need to select two apps, make a filter, choose an action, and launch it.
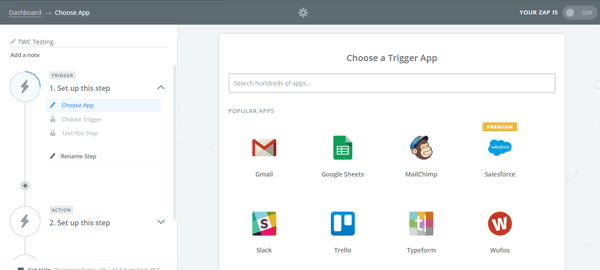
After signing in to your Zapier account, you will find a button Make a Zap. Click on it and several apps will be visible on your screen. The first app would be your source app. In other words, this is where the data will come from. For example, if you want to save Gmail attachments to Google Drive using Zapier, you need to select Gmail in the first step. You can either use the search box to find out the desired app, or you can click on the app. Before that, don’t forget to name your Zap.

Now, you need to select a trigger. You can find a different list based on the chosen app. For example, you can find the following triggers if you have selected Gmail.
- New email matching search
- New labeled email
- New attachment
- New Starred email
- New thread
- New email
Choose one trigger, and click on Save + Continue button. After that, you need to connect your account. In this case, you need to authorize your Gmail account. Therefore, click on the corresponding button on your screen and approve your account with proper login credentials.
The best part of Zapier is that you can connect multiple accounts. For example, if you want to get email attachments from multiple email accounts to your Google Drive, you can do so. Connect account(s) and don’t forget to hit the Test button. It will verify the authorization. In case, if you have any problem, it will be visible. Otherwise, you will see a Success text.
In the next step, you will be asked to test the whole thing. For instance, if you have chosen Gmail as the source, you may need to utilize Gmail according to the requirements. After testing everything, if you have got Test Successful message, go ahead. Otherwise, check if you have made any mistake.
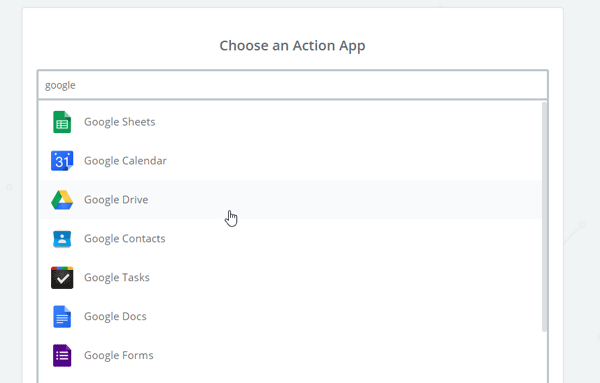
Now, you need to select an app for action. This is where the data will be saved. Therefore, choose your destination app correctly using the search box.

After that, you need to choose an action. It will be different based on the selected app. If you choose Google Drive, you will get the following actions,
- Create folder
- Upload file
- Create file from text
- Find a file
- Find a folder
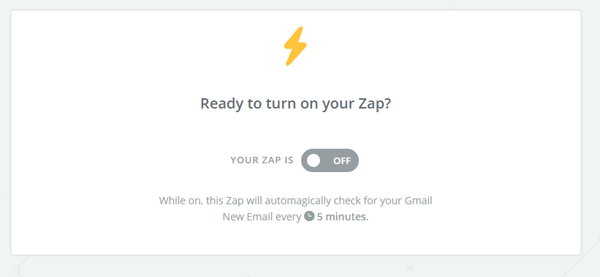
Select an action and hit the Save + Continue button. Now, you need to authorize your destination account. Again, don’t forget to use the Test button. Now, you may get few options to customize the destination account. At last, hit the Create & Continue button. Finally, you will get an option to turn on the Zap.

If you want to activate the Zap right now, toggle the respective button to get started.
Zap management
On your Zapier dashboard, you can find all your created zaps. This is possible to do the following tasks,
- Turn on or off
- Run the Zap
- Rename
- Check version history
- Copy the template
- Delete the Zap
If you do not want to run a Zap anymore, it is better to remove that Zap to avoid unwanted access. This tool also has a Connected Accounts tab, which will let you manage your connected accounts. If you want to unauthorize an account, you can click on the Disconnect button. If you want to test an account, use the Test button.
How to use pre-made Zap
It is much easier than creating the Zap on your own since the Zap is already created. You need to authorize your accounts, and that’s all! Therefore, first, select a Zap that you want to use, and hit the Use this Zap button.
Most of the ready-made Zaps have a small description so that you can understand it correctly. Hit the Create this Zap button, select trigger, action, authorize your accounts to run it. It would take no more than one minute to complete the setup.
Is Zapier a free tool?
Yes, you can use Zapier for free. However, there are some limitations to the free version. For example, you can use only 100 tasks per month. Secondly, you can run the second task after 15 minutes of running the previous task. To know more about all the limitations, it is suggested to read the entire article.
What is the alternative to Zapier?
There are mainly two alternatives you can use – IFTTT and Automation.io. Both of them come for free with some limitations. You can find almost all the apps, services, tasks, connections, etc., of Zapier in IFTTT and Automation.io. However, it is recommended to use all of them to know which one suits you the most.
Hope this automation tool will assist you to make the desired task and run then automatically. If you like it, you can visit the official website to get started.
Want to check out automate.io, a similar tool?
Leave a Reply