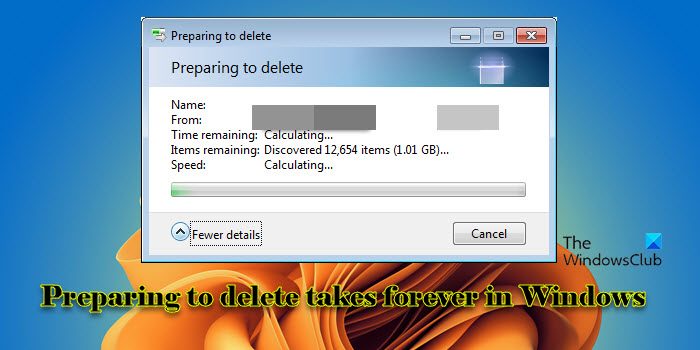
In this post, we will show you how to fix the issue if Preparing to delete takes forever to process in Windows. The ‘Preparing to delete’ prompt appears when a user attempts to delete files or folders on his Windows 11/10 PC. It is an indication that the system is performing some background activities before carrying out the deletion. These activities include checking the file permissions, verifying that any programs are not using the files, calculating the overall size of the items to be deleted, and other system checks.
Why does Windows take so long to delete files?
Several factors, including the size of the files or folders, the total number of items, the speed of the storage device, and any background processes that might be impacting system performance, can affect how long Windows takes to prepare files for deletion. If the ‘Preparing to delete‘ prompt takes an unusually long time or appears to be stuck, it could indicate a problem with system resources, disk errors, or file system corruption.
Preparing to delete takes forever in Windows 11/10
You may use the following fixes if the Preparing to delete prompt takes forever to process on your Windows 11/10 PC:
- Delete the data in lots
- Delete files in Safe Mode
- Optimize system resources
- Optimize hard disk
- Disable thumbnail previews
- Disable Windows Search Indexer
- Disable Remote Differential Compression
- Delete files using alternate methods
Let us see this in detail.
1] Delete the data in lots
If there are many files, including large ones, that you plan to delete all at once – and then you face this issue, we suggest you delete the files in parts or lots and not all at once.
2] Delete files in Safe Mode
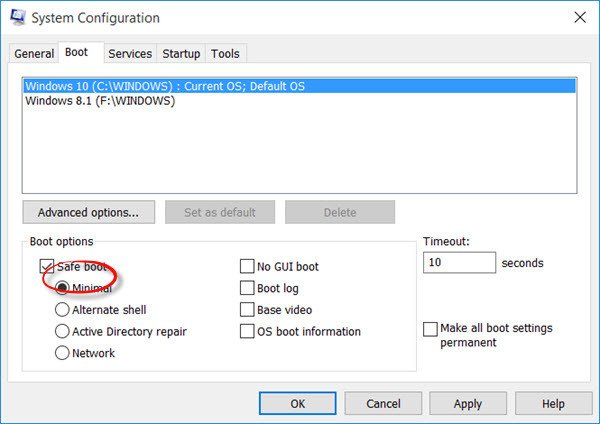
You can also boot your system into Safe Mode and then try deleting the files.
3] Optimize system resources
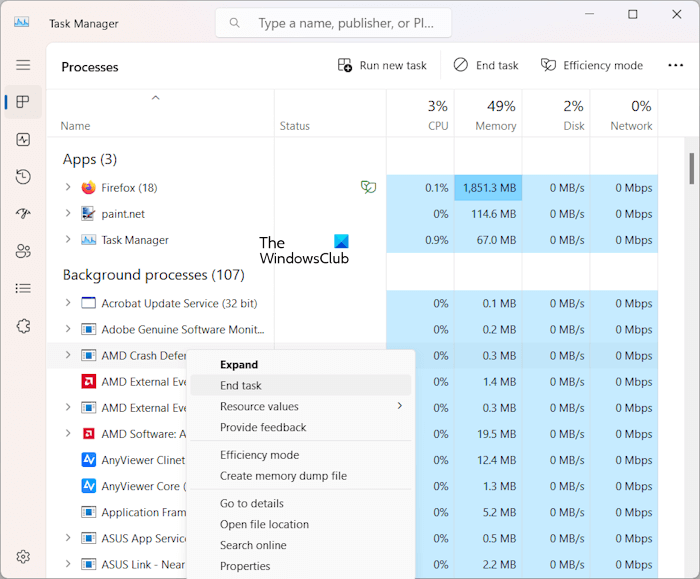
Optimizing system resources on your Windows 11/10 PC can help speed up the file deletion process.
- Free up CPU resources by closing any unnecessary applications or background processes.
- Free up Memory (RAM) resources by closing unused applications or reducing the number of open tabs in your browser.
- Free up disk I/O resources by stopping or prioritizing disk-intensive tasks.
- If you’re deleting files from a network drive or cloud storage, make sure that no other network-intensive tasks are running that could compete for bandwidth and slow down file deletion.
4] Optimize hard disk
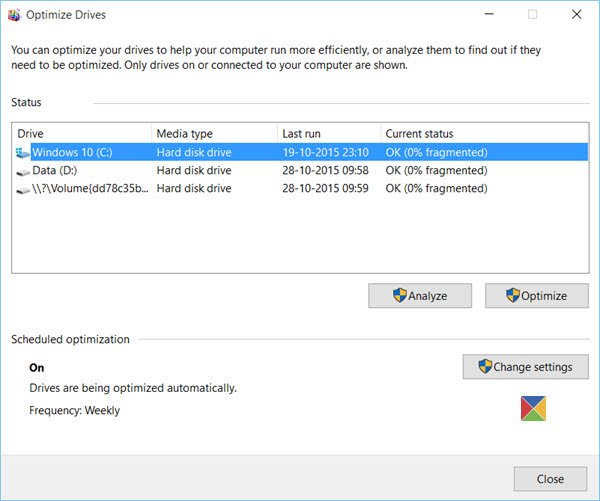
Lack of free disk space, disk fragmentation, file system errors, and other disk-related factors can cause issues with file deletion in Windows.
- Run the Disk Cleanup Utility to remove temporary files, system files, and other items that are taking up unnecessary space on the disk.
- If your disk is heavily fragmented, run the built-in Disk Defragmenter tool. This will reorganize files on your disk and improve overall disk performance, potentially speeding up file deletion.
- Also, run Check Disk (CHKDSK). It will fix file system corruption, bad sectors, and other disk-related problems that might be preventing files from being deleted properly.
5] Disable thumbnail previews
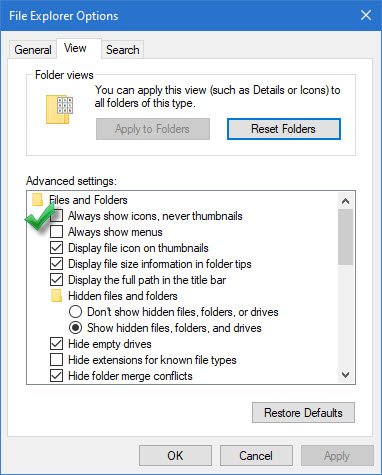
Generating and managing thumbnail previews can consume resources, increase disk I/O operations, and lead to CPU and file system overhead, especially when dealing with a large number of files or files with large sizes.
Disabling thumbnail previews can effectively reduce system resource consumption, disk I/O overhead, processing overhead, and file system overhead associated with managing thumbnail caches on your Windows PC. This can speed up file deletion and fix the ‘Preparing to delete’ prompt. However, this also makes it less convenient to identify files based on their content without opening them. So we recommend enabling thumbnails again once the issue is solved.
Follow these steps to disable thumbnail previews on your Windows 11/10 PC:
Click on the Folder icon in your taskbar to open File Explorer. Click on the three-dots icon in the toolbar on top. Select Options.
Folder Options window will appear. Go to the View tab and check the box next to Always show icons, never thumbnails under the Files and Folders section. Click Apply, followed by OK to save changes.
6] Disable Windows Search Indexer
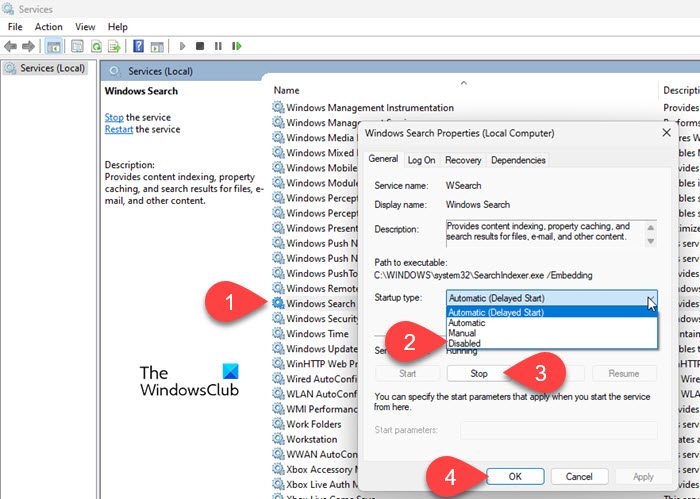
Windows Search Indexer is a background service that creates an index of files on a system’s hard drive to facilitate faster search. It is only required when you search your directories or folders or use features that depend on indexed content.
Disabling Windows Search Indexer can free up system resources, reduce disk activity, and help speed up certain operations, including file deletion, on systems with slower hard drives or limited resources. Once you disable the service, Windows will no longer run it automatically.
Follow these steps to disable Windows Search Indexer on your Windows 11/10 PC and see if it helps:
Press Win+R to open the Run dialogue. Type services.msc and press the Enter key. Windows Services Manager will open up. Scroll down to the bottom and locate Windows Search in the list of services. Right-click on it and select Properties from the context menu.
In the Windows Search Properties window, select Disabled from the Startup type dropdown menu under the General tab. If the Service status is ‘Running’, click the Stop button to terminate the service immediately. Click Apply, and then OK to save the changes.
To re-enable indexing, return to the same settings and change the Startup type to Automatic.
7] Disable Remote Differential Compression
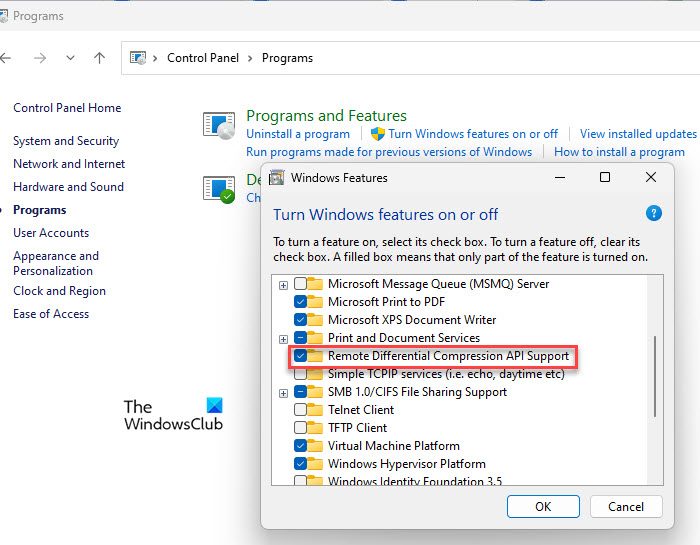
Remote Differential Compression (RDC) is a feature in the Windows operating system that helps optimize data transfer while synchronizing files between two computers over a network. Although disabling RDC may not directly impact the speed of the file deletion process on your local system, a few users have reported that this has helped improve overall system performance, especially in file operations scenarios.
To disable Remote Differential Compression, follow these steps:
Click on the Windows Search box and type ‘control’. Click Open next to the Control Panel option. In the Control Panel window, click on Programs in the bottom left corner. Then click on Turn Windows features on or off under Programs and Features.
Windows Features popup will appear. Uncheck the box next to Remote Differential Compression API Support and click OK to apply changes.
8] Delete files using alternate methods
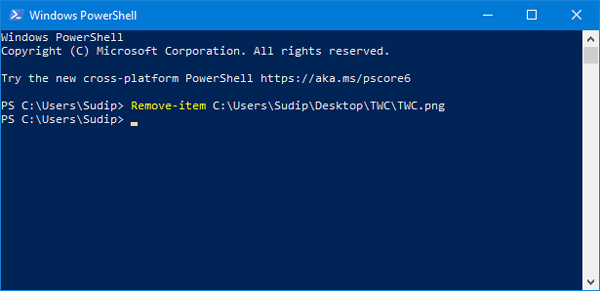
If File Explorer is slow or unresponsive, you may use alternate methods to delete your files.
For example, you may delete files and folders using Command Prompt or use Windows PowerShell to force delete files or folders on your Windows PC.
To delete a file using Command Prompt, open Command Prompt with admin privileges and navigate to the directory containing the file you want to delete using the ‘cd‘ command. Then type the ‘del‘ command followed by the name of the file you want to delete.
del /f /a <file_path_with_extension>
To delete a folder, type the following command:
rd /s <folder_path>
Similarly, to delete a file using PowerShell, open PowerShell with admin privileges and type the following command:
Remove-Item <file_path_with_extension>
To delete a folder, type the following command in the PowerShell window:
Remove-Item <folder_path>
You may also use third-party file cleanup tools to delete unwanted files from your Windows PC permanently. Examples include OW Shredder and other File Shredder software for Windows.
I hope this helps.
Read: Reset this PC stuck in Windows.
How do I quickly delete a folder in Windows 11?
You can quickly delete a folder in Windows 11 using several methods. Navigate to the folder in File Explorer, right-click on it, and select Delete from the context menu. Alternatively, select the folder in File Explorer and press Shift + Delete on your keyboard to permanently delete it from your system (bypassing the Recycle Bin). You can also use Command Prompt or PowerShell (as explained above) to delete the target folder.
Read Next: Windows computer taking forever to restart or shutdown.